Construction of the new Sonex Highwing prototype continues, and it’s safe to say that the aircraft is about 90 percent complete. Old homebuilding adages aside, we are working hard to make first flight this Spring. Don’t forget to subscribe to the Sonex Highwing Mailing List to automatically receive future updates!
50 Pre-Orders and Counting: Reserve Your Place in Line for a Highwing!
As-of this update, we have 54 Sonex Highwing pre-orders via our Kit Reservation Deposit program, launched with our February project update. This response is a tremendous early indicator of the level of interest from prospective Sonex Highwing builders.
Get yourself in line for a kit by placing a $500 Kit Reservation Deposit today. These deposits not-only get you a place in line amongst your fellow future Highwing builders, but also helps Sonex to plan for kit inventory needs. Kit Reservation Deposit Holders will be given the opportunity to turn their reservations into firm orders following the first flight tests of the prototype aircraft. Deposits are refundable minus a $50 cancellation fee. If you have any questions, please reach-out to us via our Contact Form.
|
Deposits are refundable less a $50 Cancellation Fee. |
Dynon Skyview Instrument Panel and Airframe Wiring
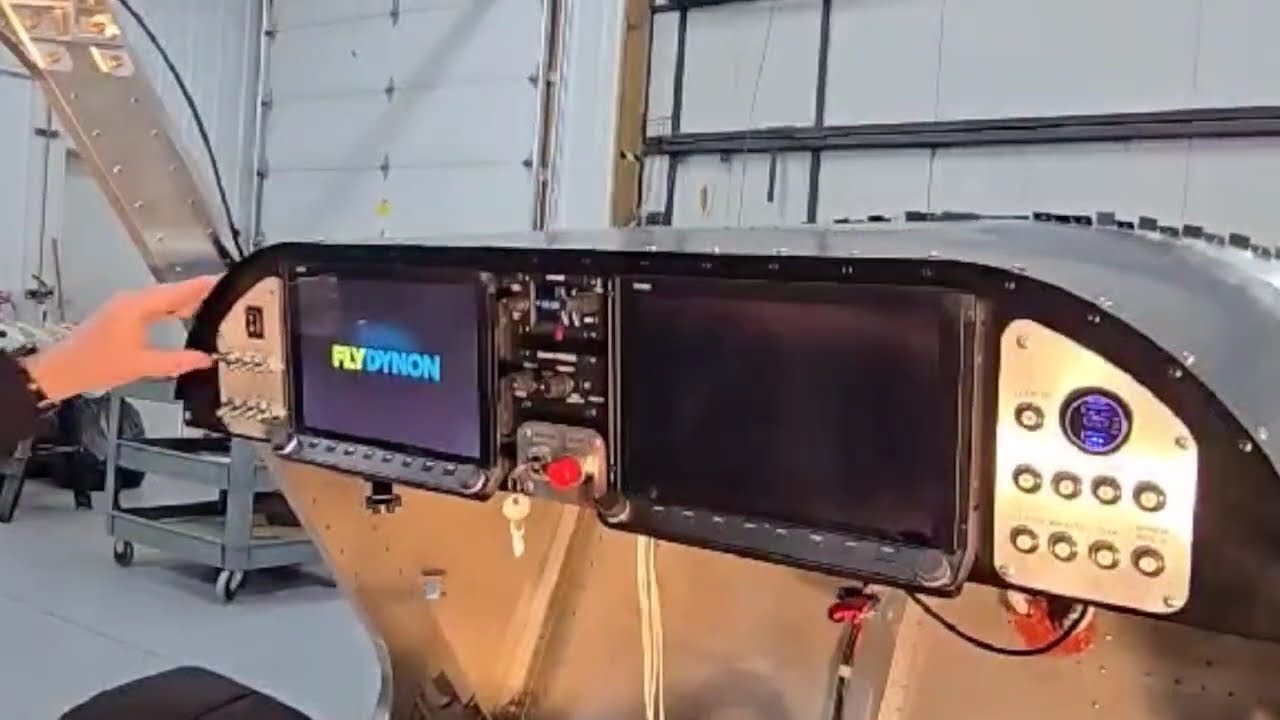
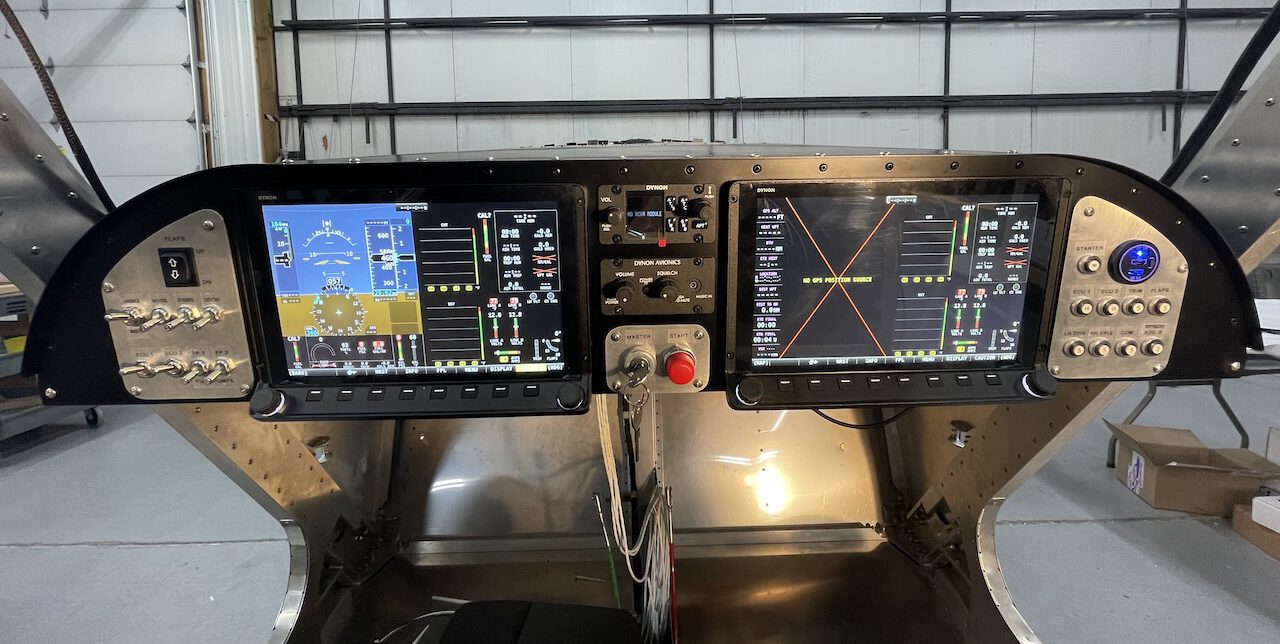
Aside from a couple odds & ends such as headset jacks, the prototype Sonex Highwing airframe is almost completely wired including all UL Power UL350iS engine wiring and installation of the dual 10″ Dynon Skyview HDX instrument panel. Dynon employee and Sonex builder Dave Weber visited the Sonex factory for a couple days earlier this Spring to get the panel installation started with Dynon harness layouts, installation of the instruments in the panel using the Dynon Universal Module Mounting Tray Kit and a test run of the system on ground power. Last week, we wrapped-up the installation and wiring of all switches and breakers and started-up the system on ship power for the first time.
In addition to the Dynon Universal Module Mounting Trays, this panel uses removable switch and breaker panels to allow easy access to all wiring, and there is ample space between the panel and the main fuel tank for connectors and wire loops. Connecting the Dynon EMS to the UL Power ECU’s CAN Bus greatly simplified harness wiring and connection to various engine sensors.
The Sonex team is also experimenting with the use of a solid-state master relay, saving weight, eliminating moving parts, and reducing relay power consumption to a maximum of 13mA (0.013 Amps). The solid-state relay is performing great so-far and we’ll continue to monitor its performance as we begin engine runs and start flying.
 Test fitting the Highwing instrument panel with cutouts to the glare shield.
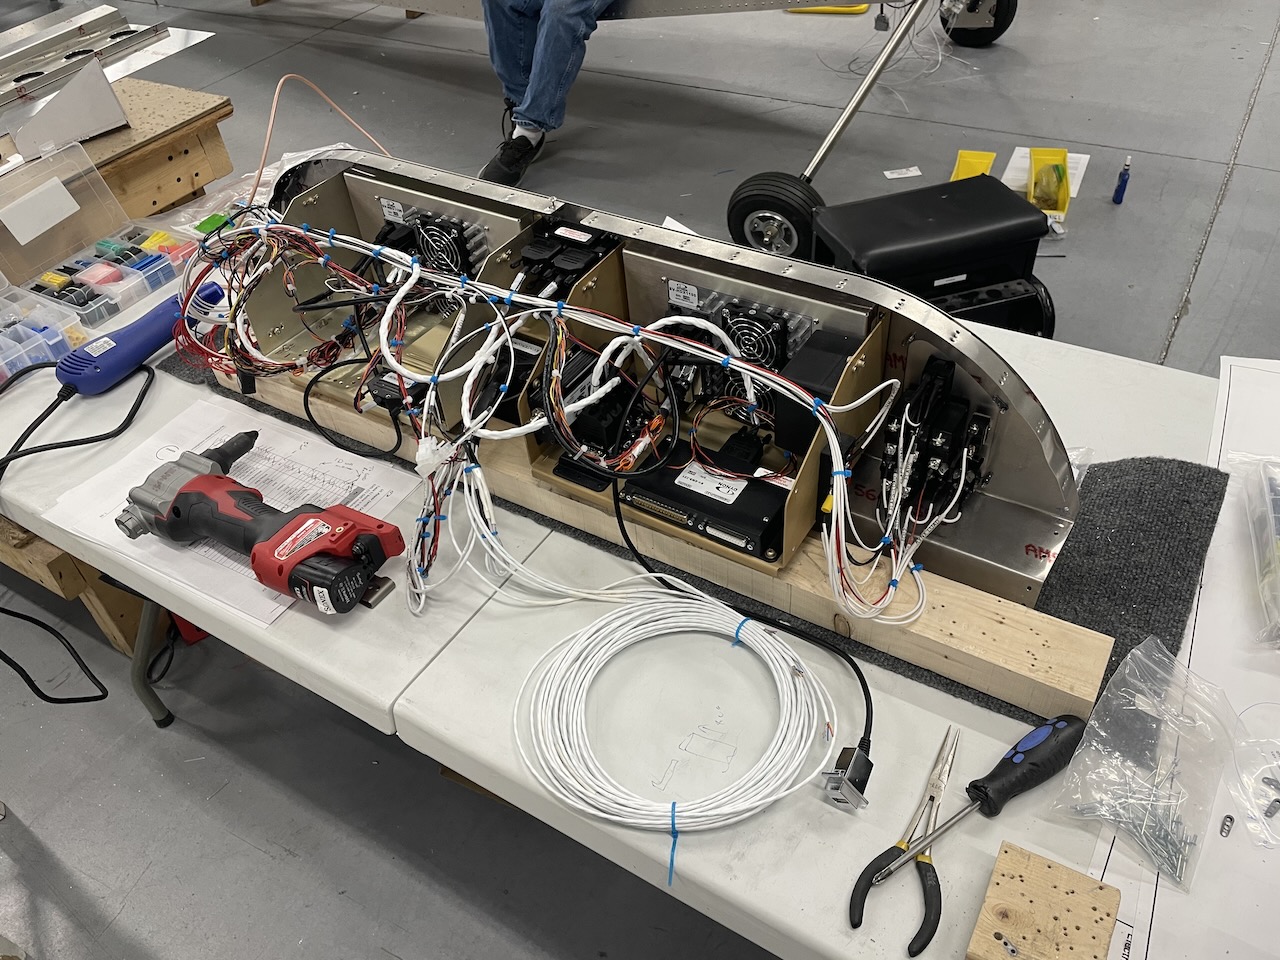
 Dynon supplied wire harnesses laid-out on the work bench for integration and trimming to efficient lengths.
 Instrument panel ready for final installation in the aircraft with all switches, breakers and bus bars installed.
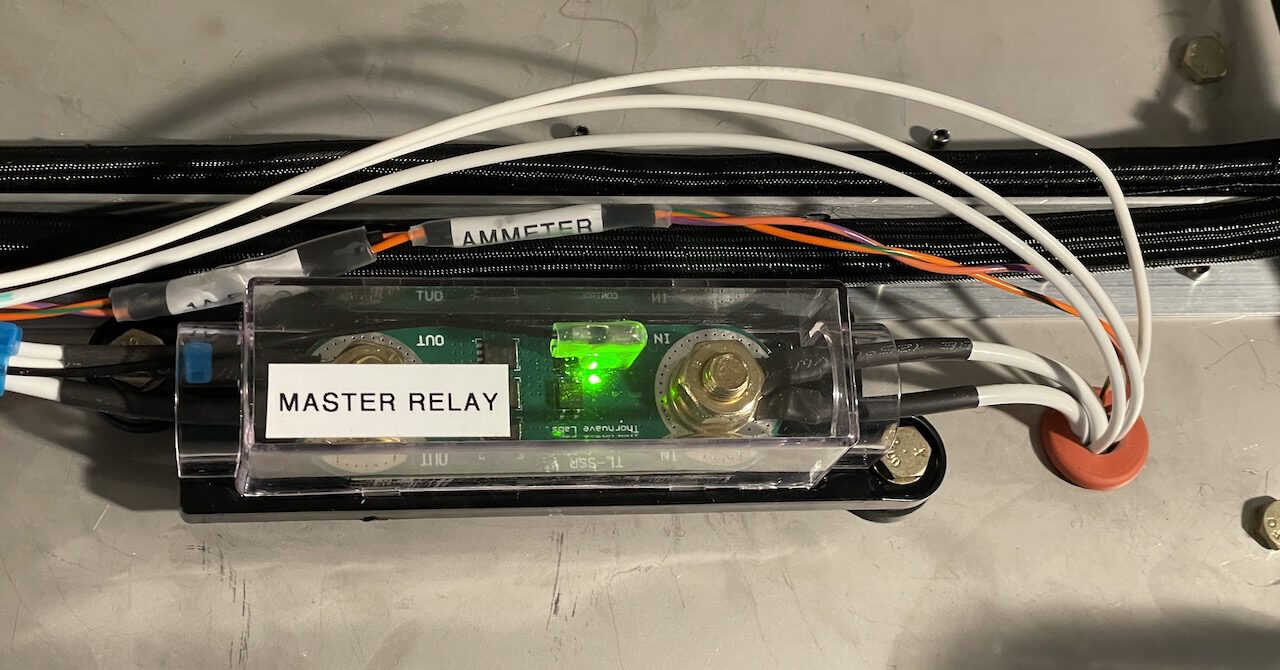 This robust solid-state master relay in the Sonex Highwing is rated for 100A continuous with the capability to take loads up-to 150A for 1 minute while drawing only 0.013A and having no moving parts.
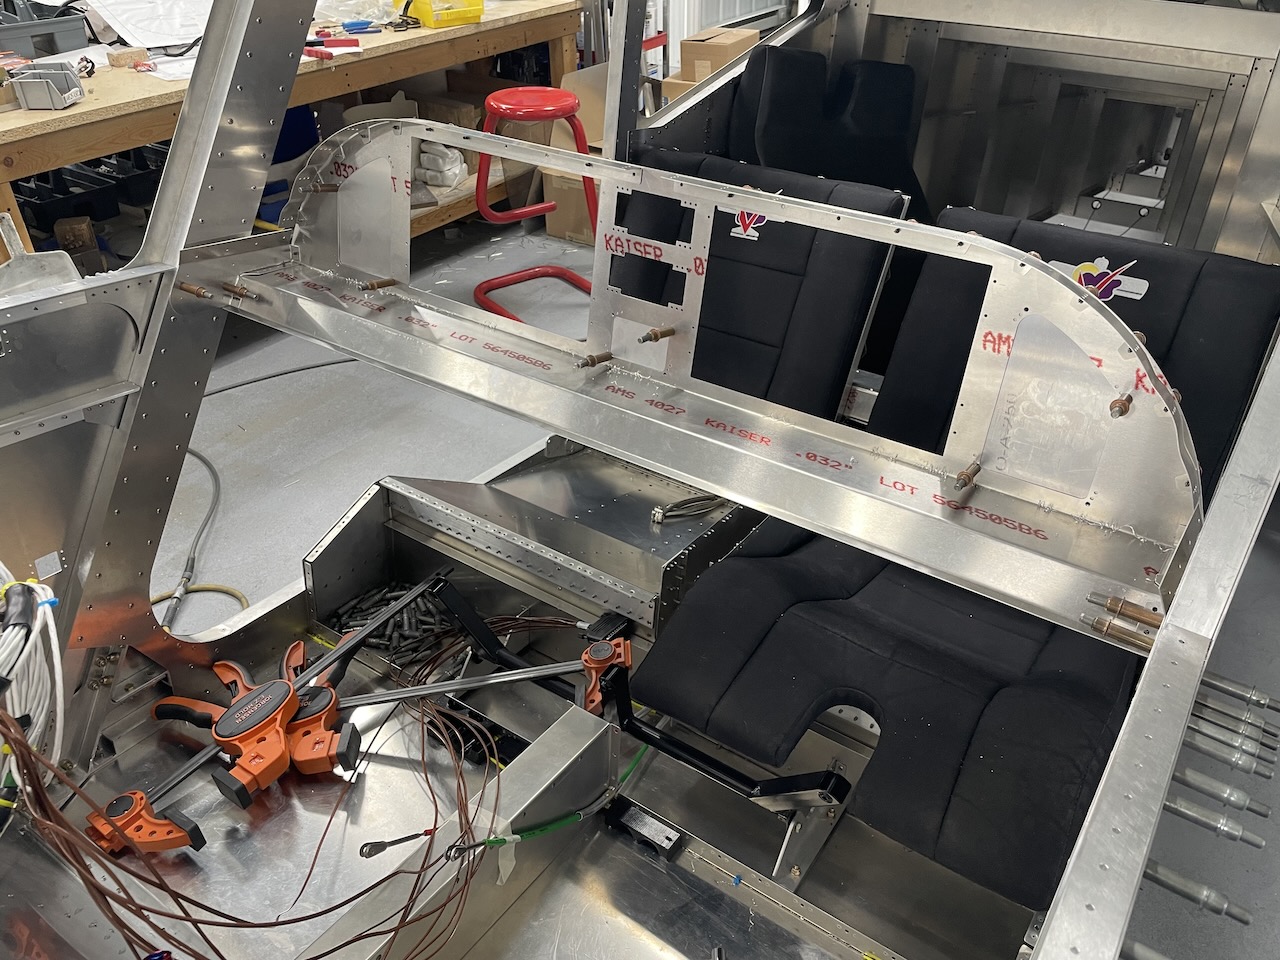 Like all other Sonex aircraft, the Highwing’s instrument panel is a structual fuselage cross tie and works with the glare shield to create a torsion box for the forward fuselage structure.
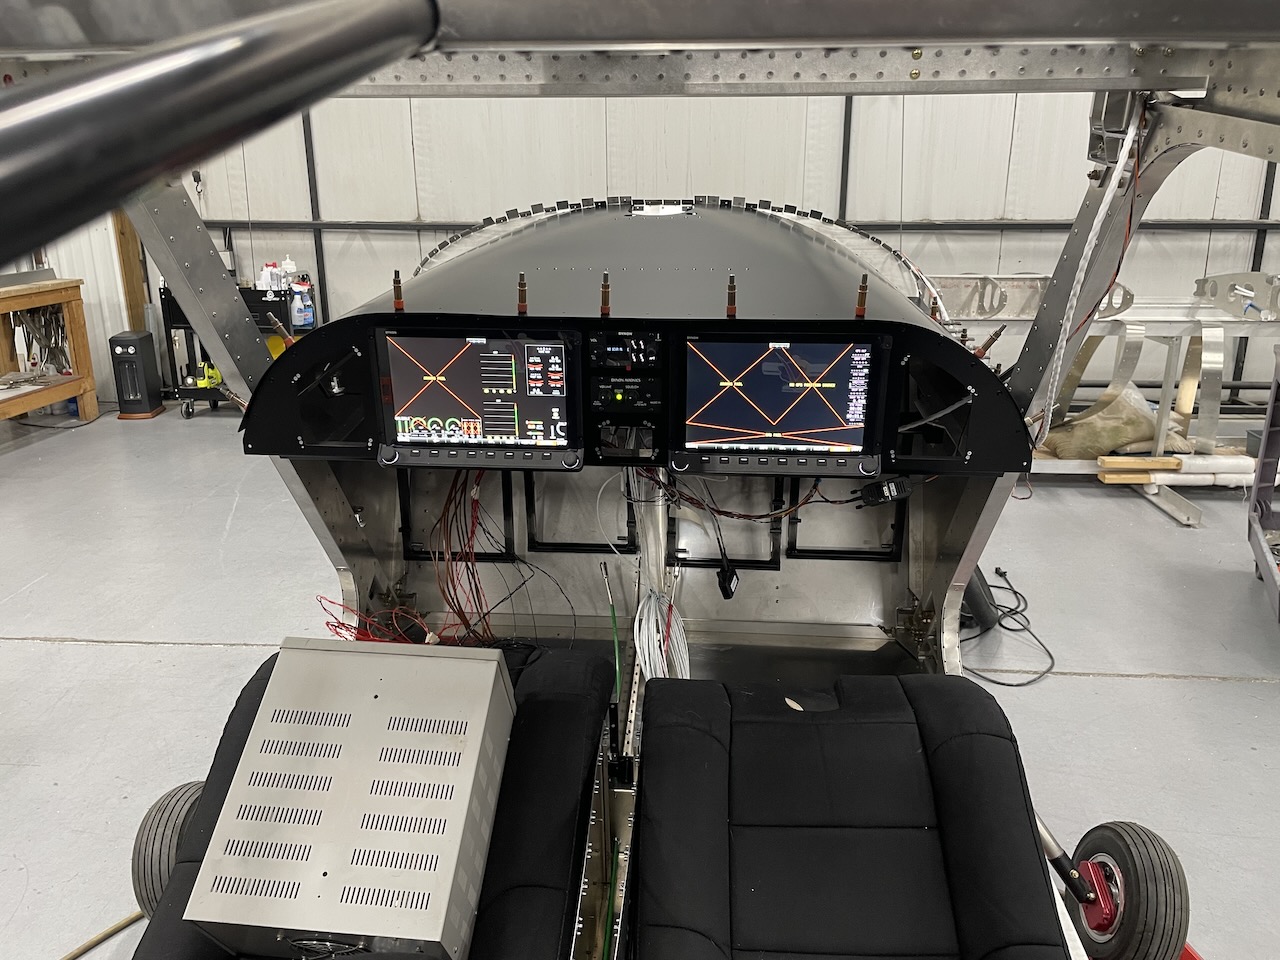 First test-run of the Dynon panel in the aircraft on ground power via the DC power supply on the pilot’s seat.
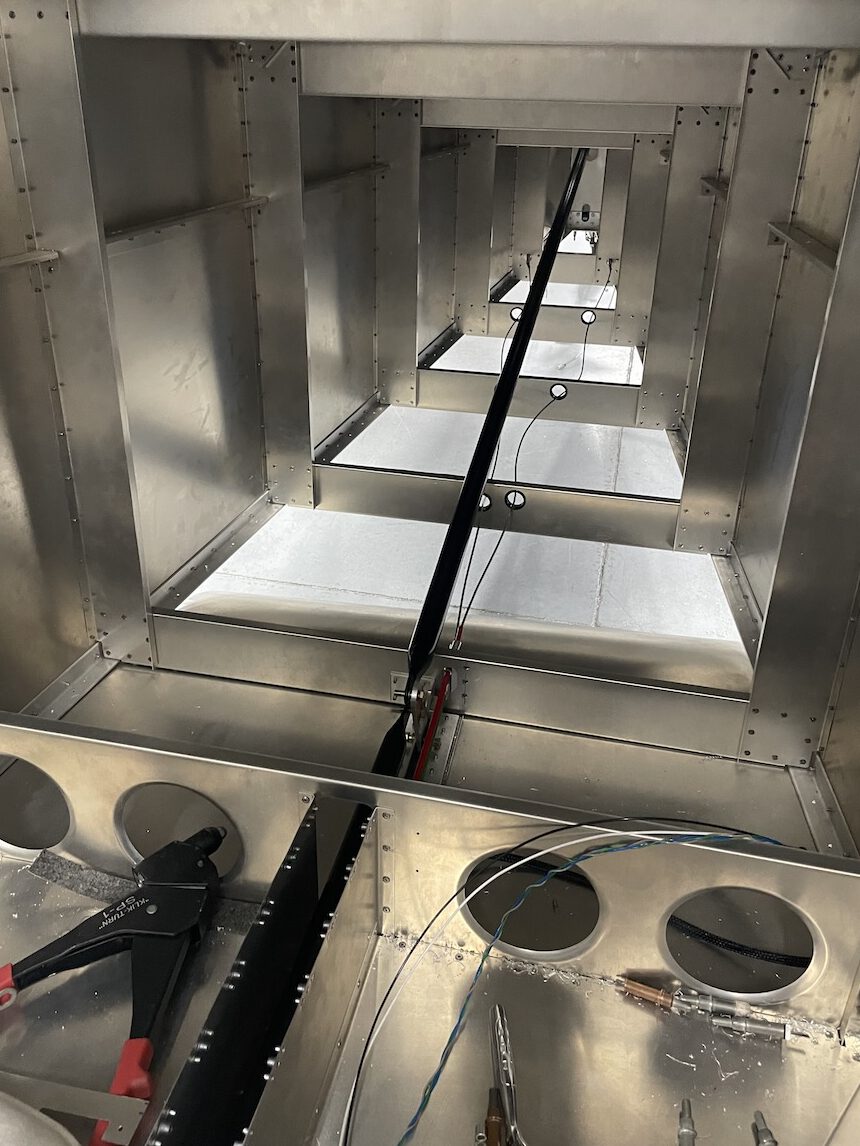
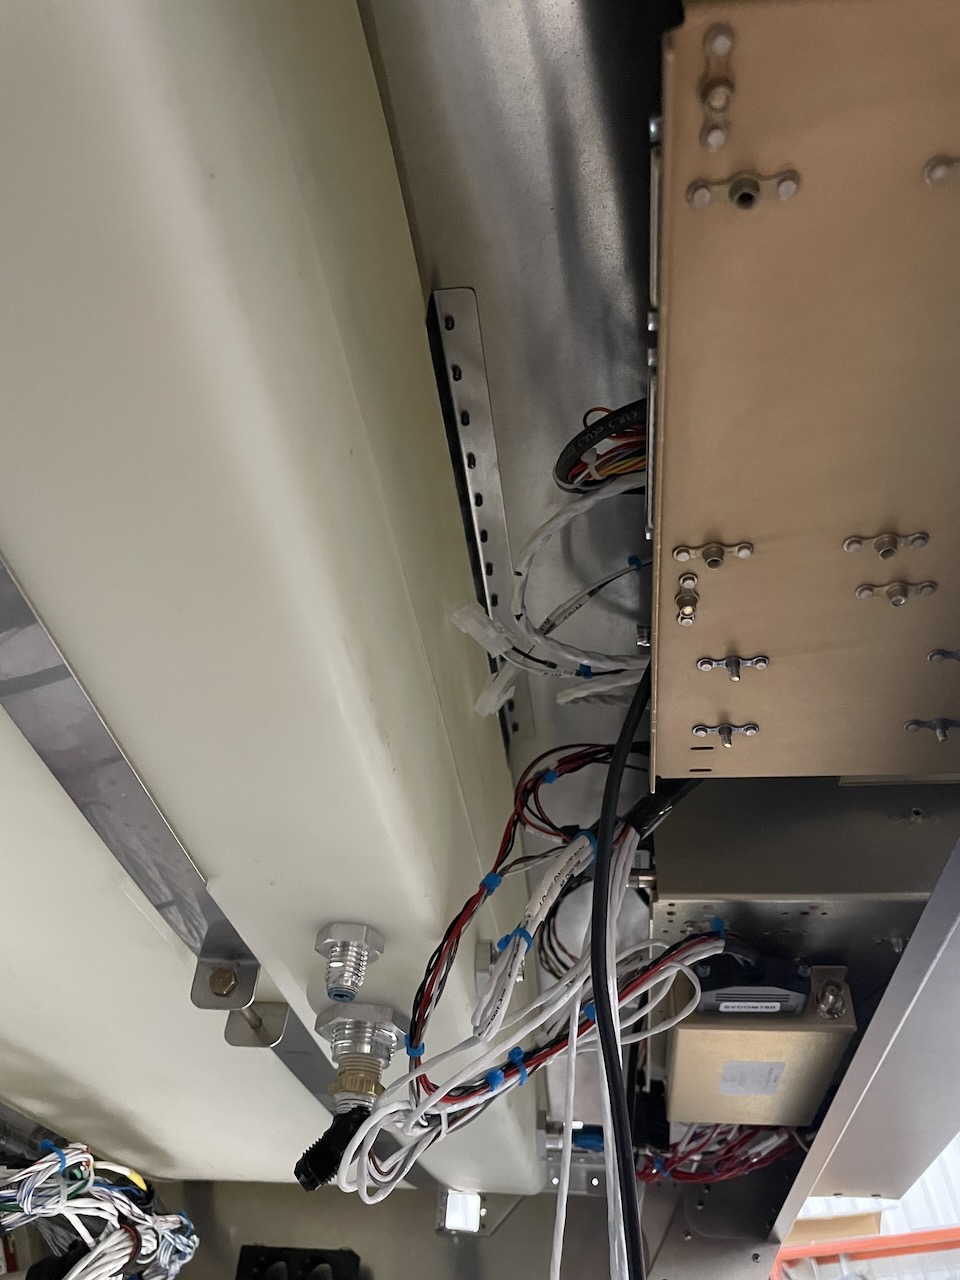 View underneath the instrument panel: There is plenty of space between the back of the main fuel tank and the insrument panel for multi-pin connectors and wire harness service loops.
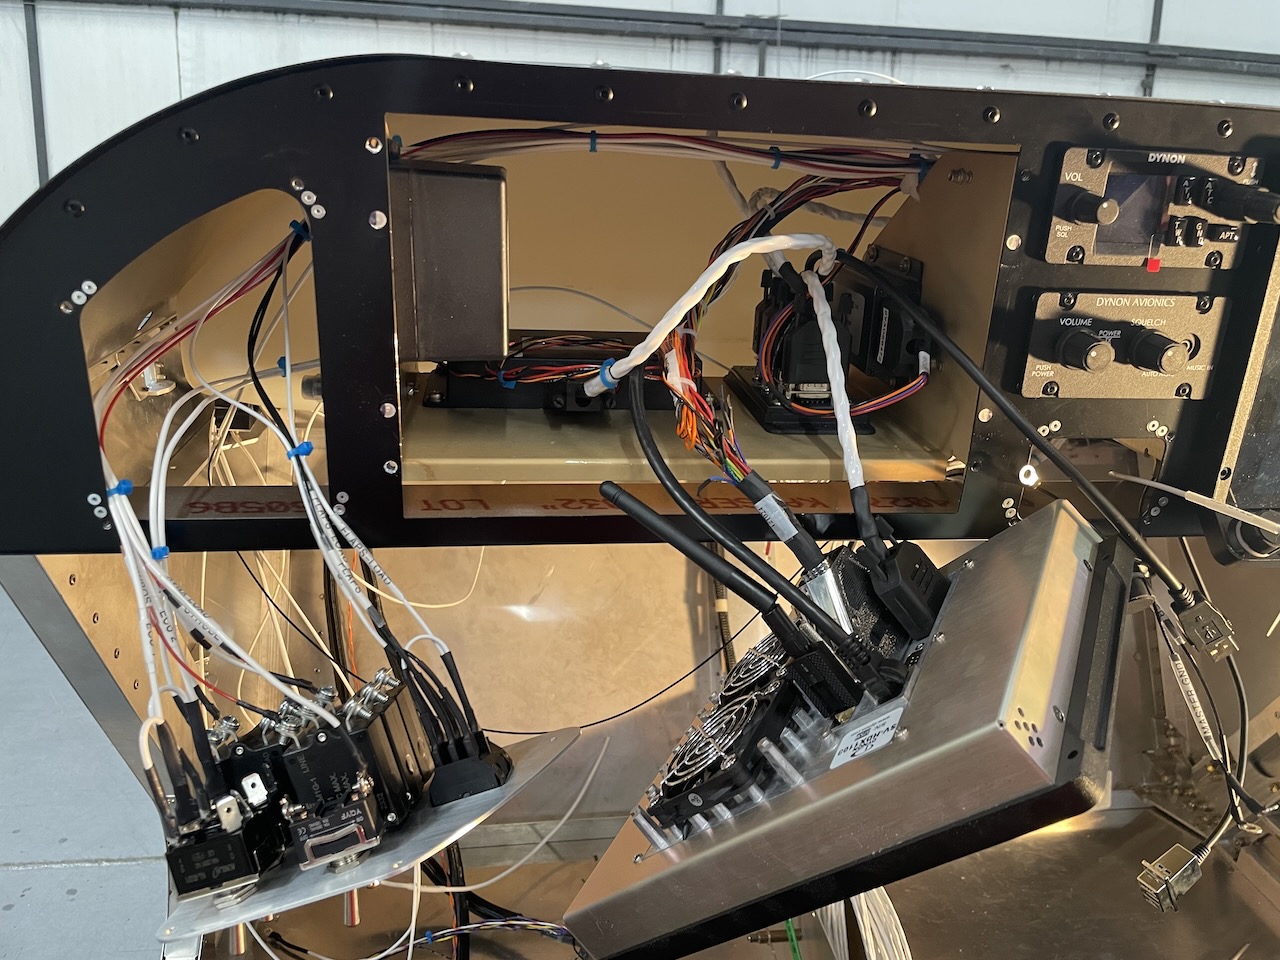
 Final wiring of airframe-side harnesses, ground wires and switches.
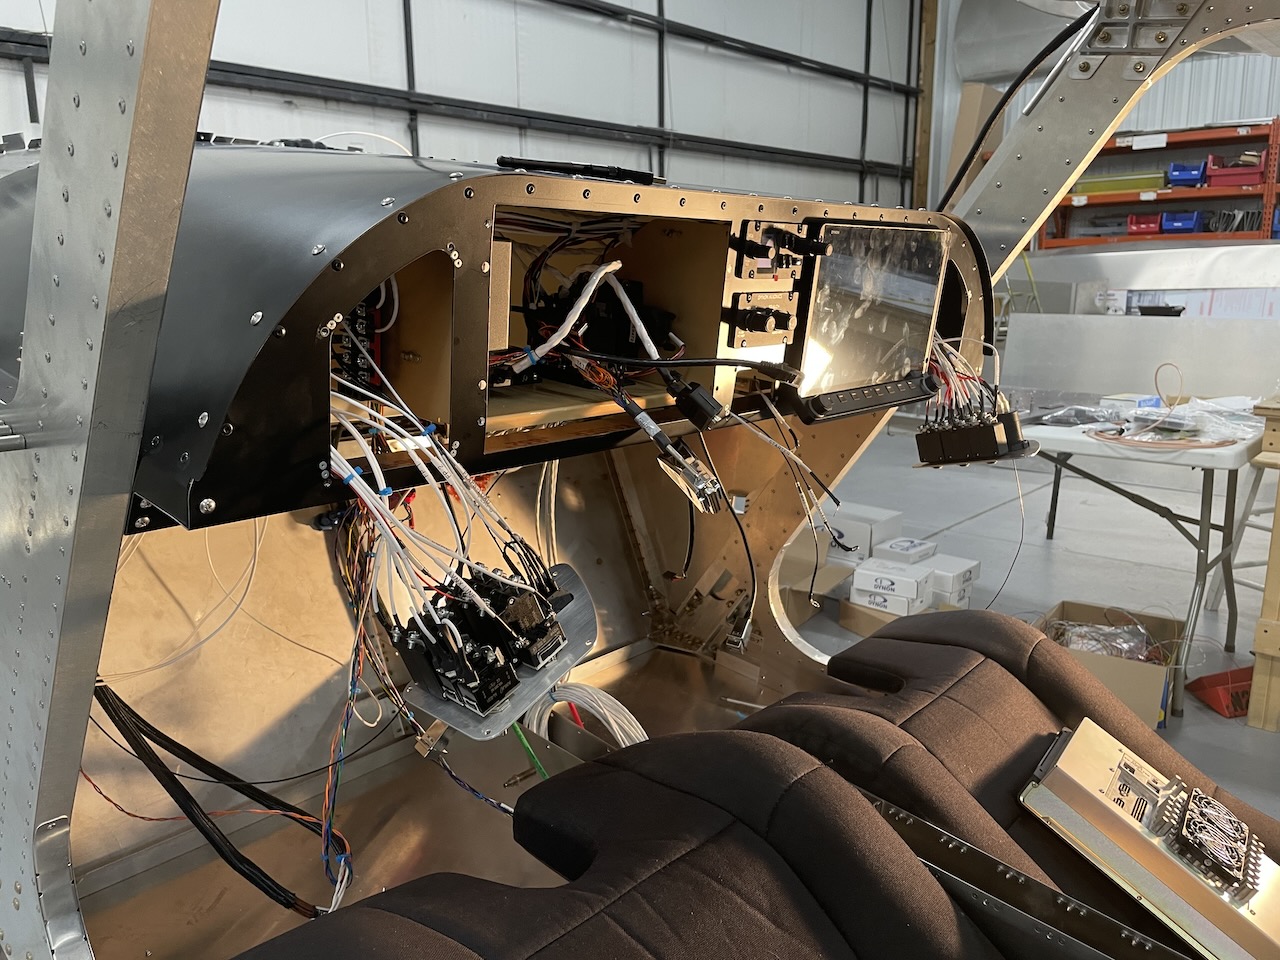
 A closer look at the level of accesibility offered by the Dynon mount trays and the use of removable switch and breaker panels vs. having to remove the entire insrument panel for access.
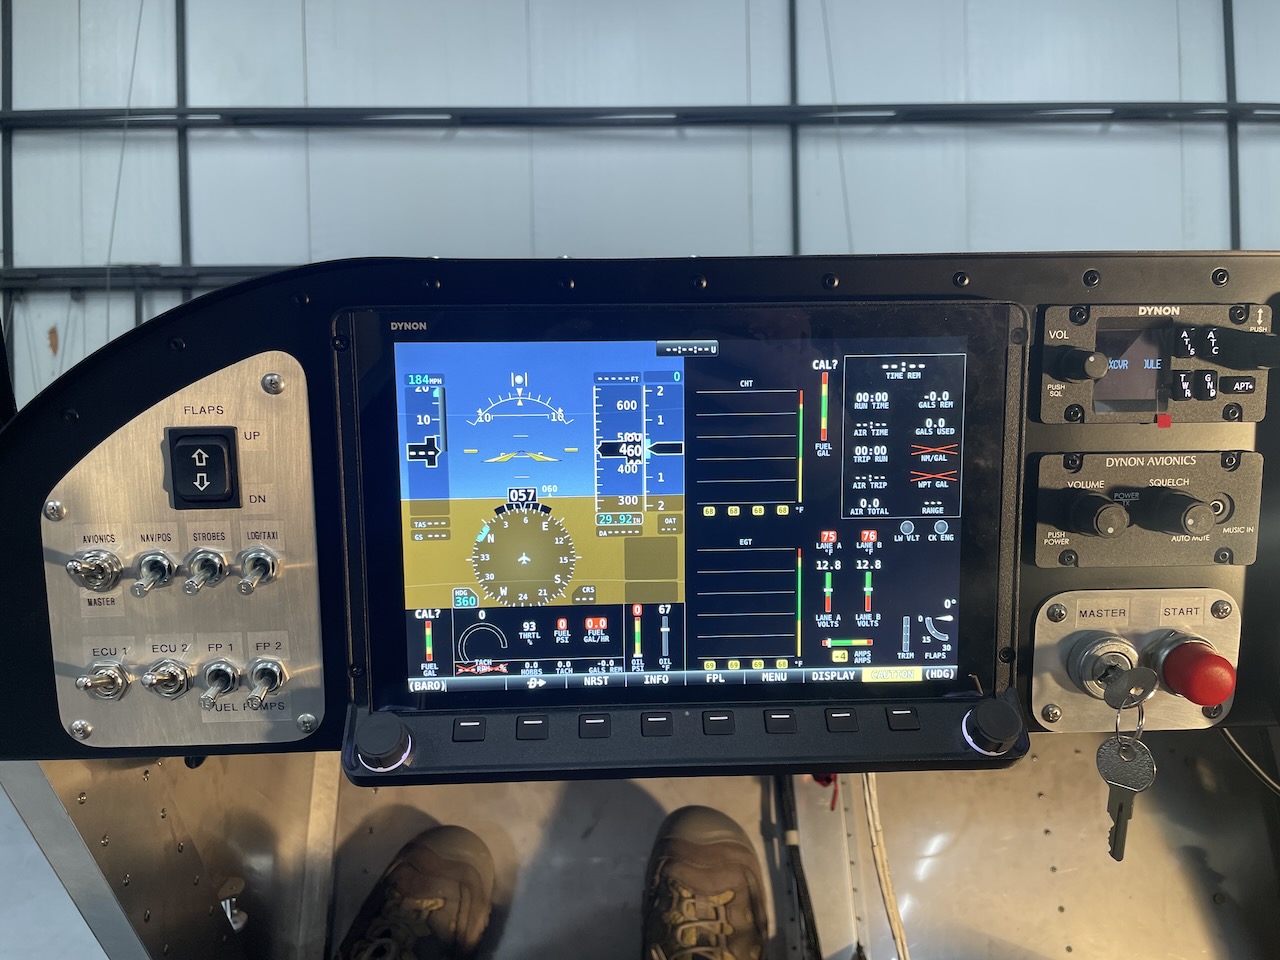 Pilot’s side display and switch panel.
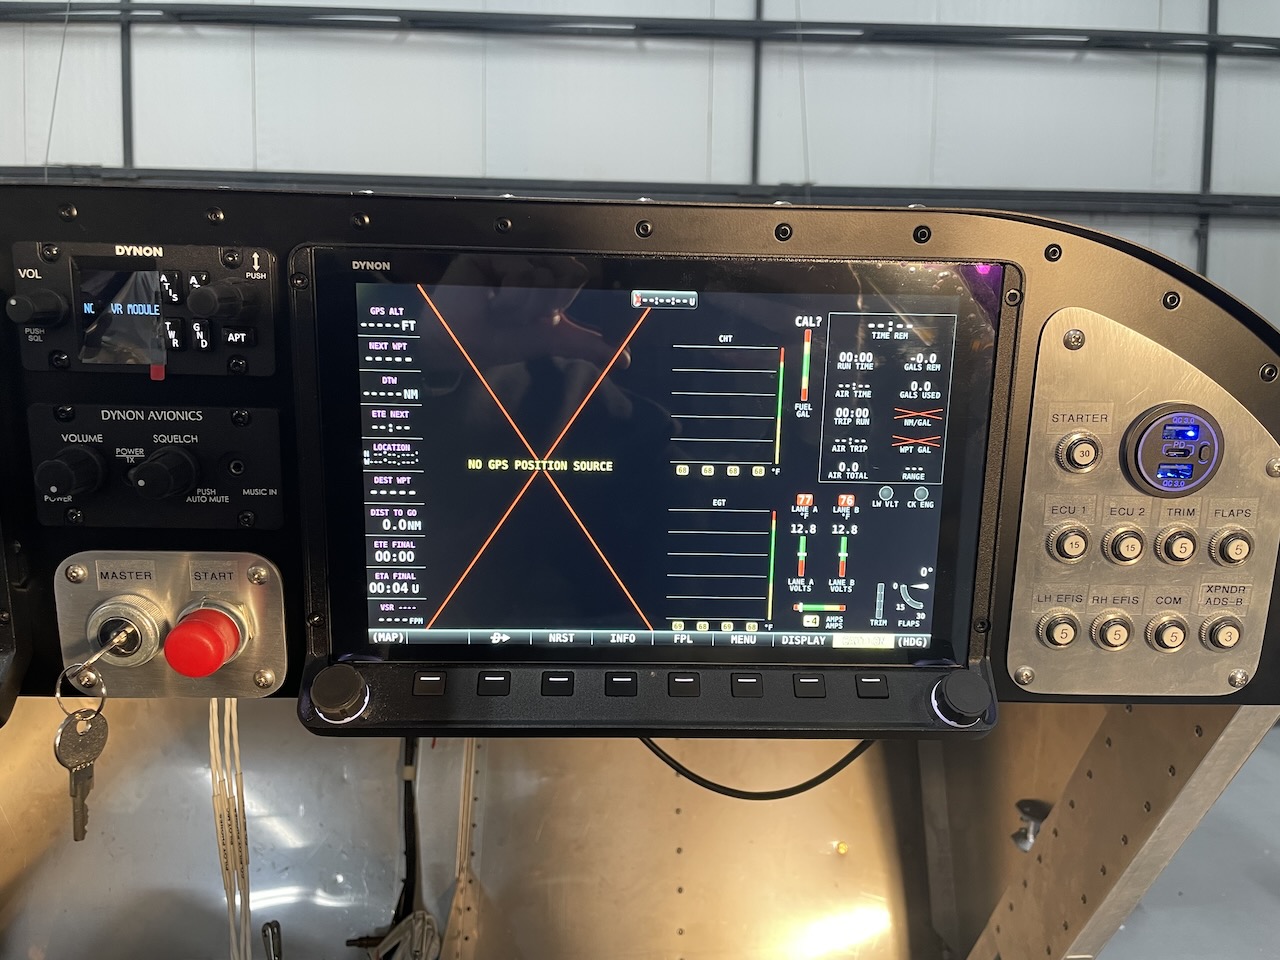 Copilot’s side display, breaker panel, and USB charging port.
Flap Actuator and Controls
In addition to all the panel and engine wiring, the electric flap actuator has been installed along with the flap torque tube and all flap actuator wiring. We will be installing an electric trim actuator for control stick actuation of the trim springs vs. panel mounting our traditional AeroConversions Trim System control wheel, and wiring has been run into the tailcone for installation of the trim actuator. Elevator pushrods have also been received from our welding shop and have been installed. Additionally, the bellcrank for the lower aileron torque tube is almost complete at the machine shop (see our February update for more on the Sonex Highwing controls system).
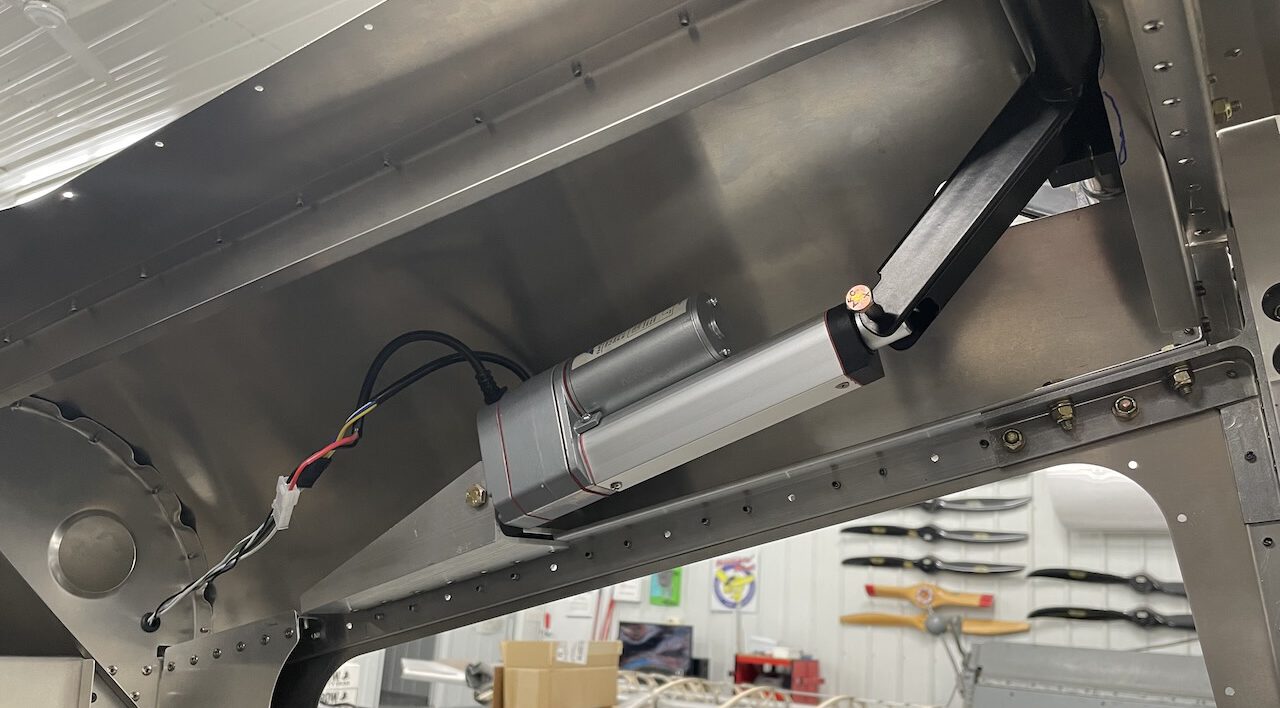 Electric flap actuator and flap torque tube installed.
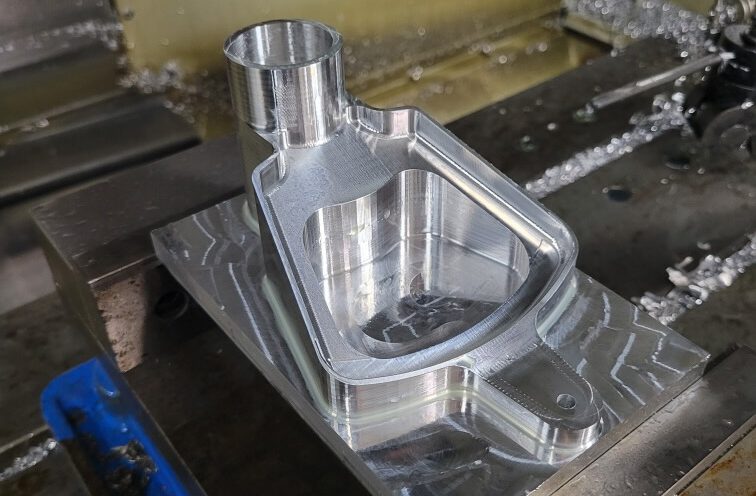 Lower aileron torque tube bellcrank machining.
 Elevator pushrod installation.
Window Installation
Windows for the cockpit doors and tail cone have been cut-out and have been fitted. We are in the process of evaluating various weatherproofing options for the windows, and final installation of windows will come soon. Progress also continues on tooling for production of the Highwing windshield.
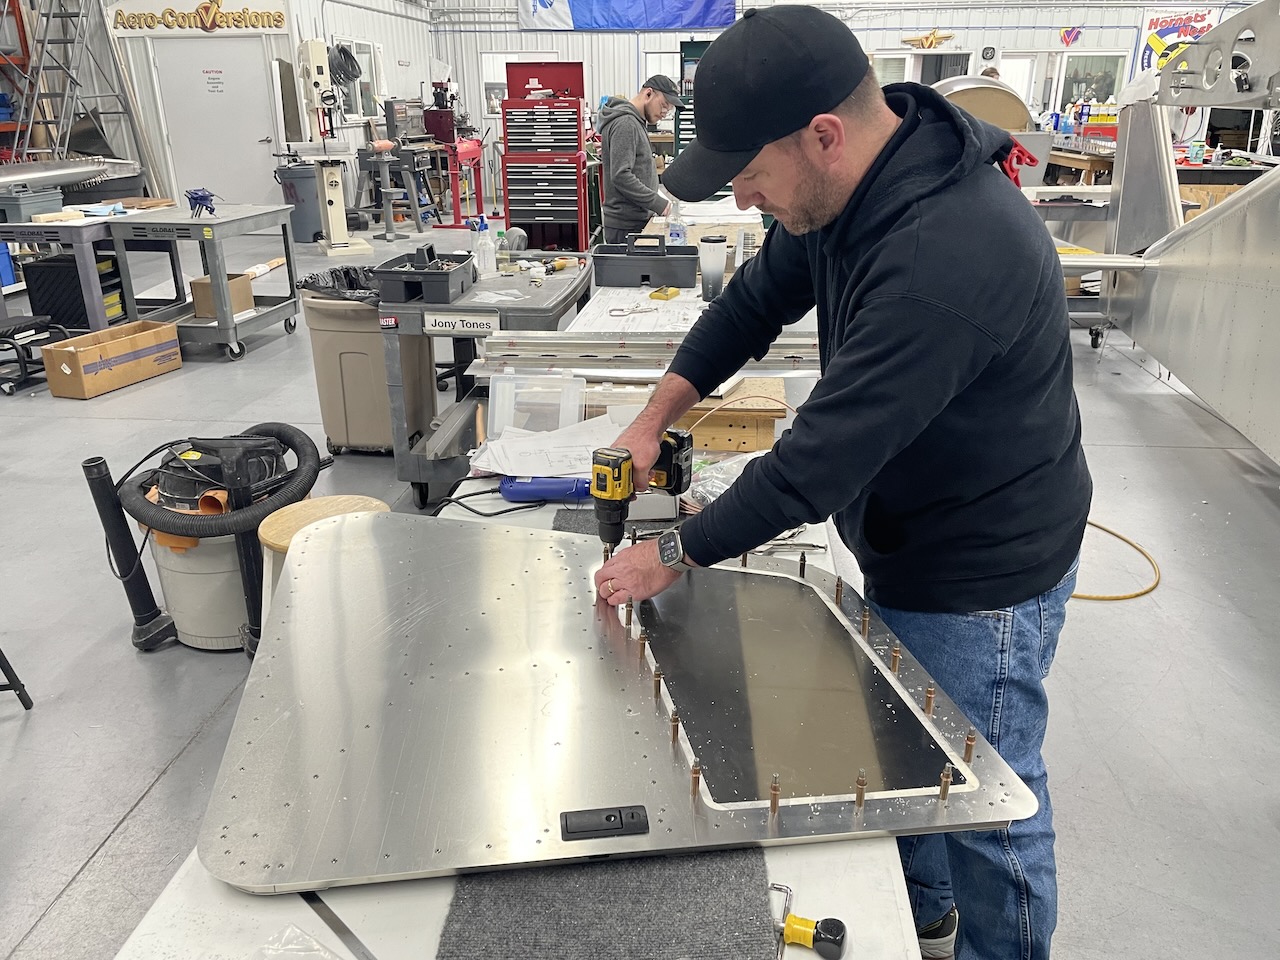 Cris pilot drills the window for the pilot’s side cockpit door.
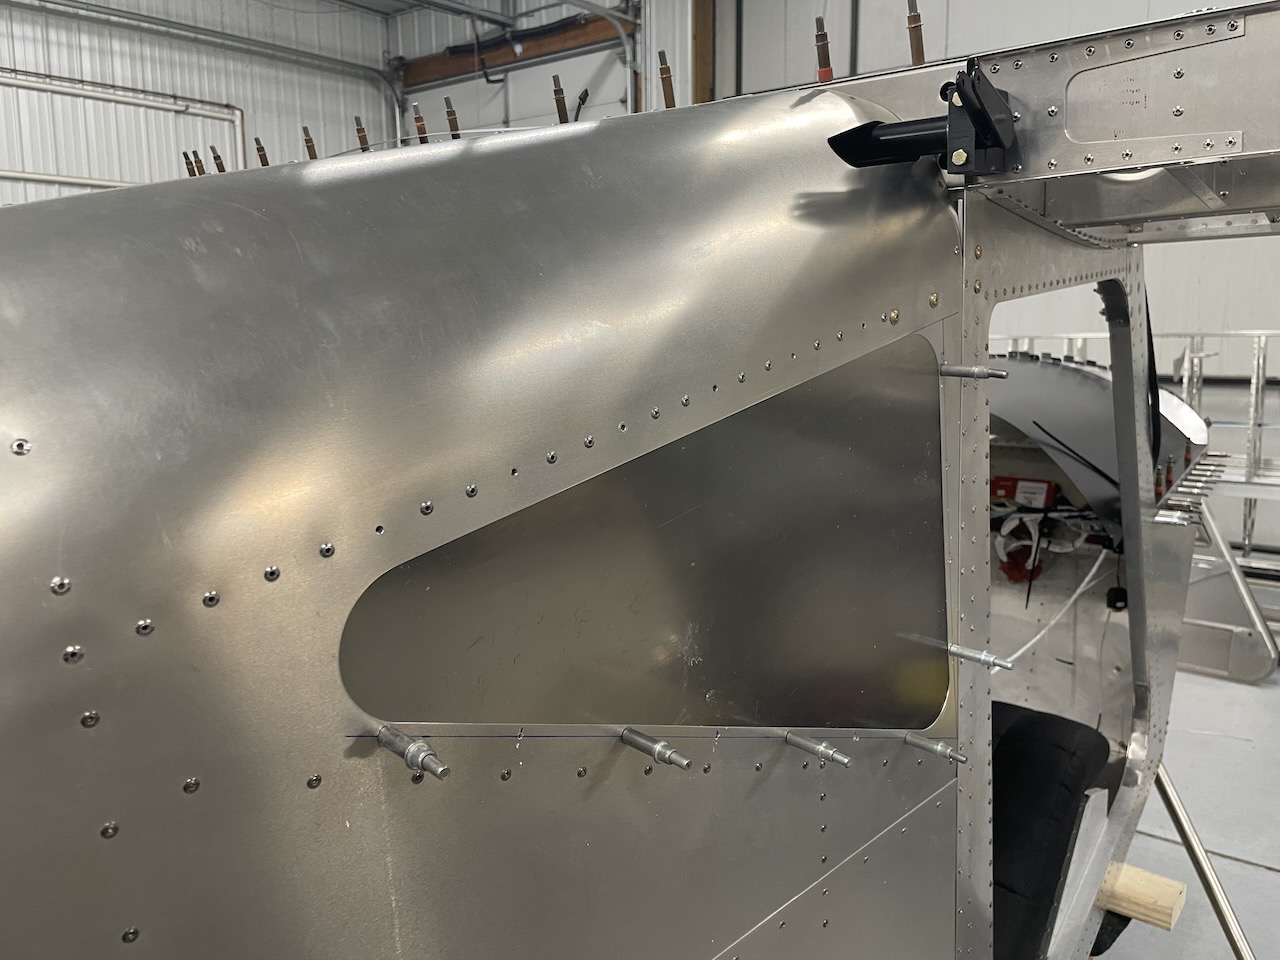 Tailcone copilot’s side window being fitted (window still has protective film installed). The flap torque tube installation can also be seen here.
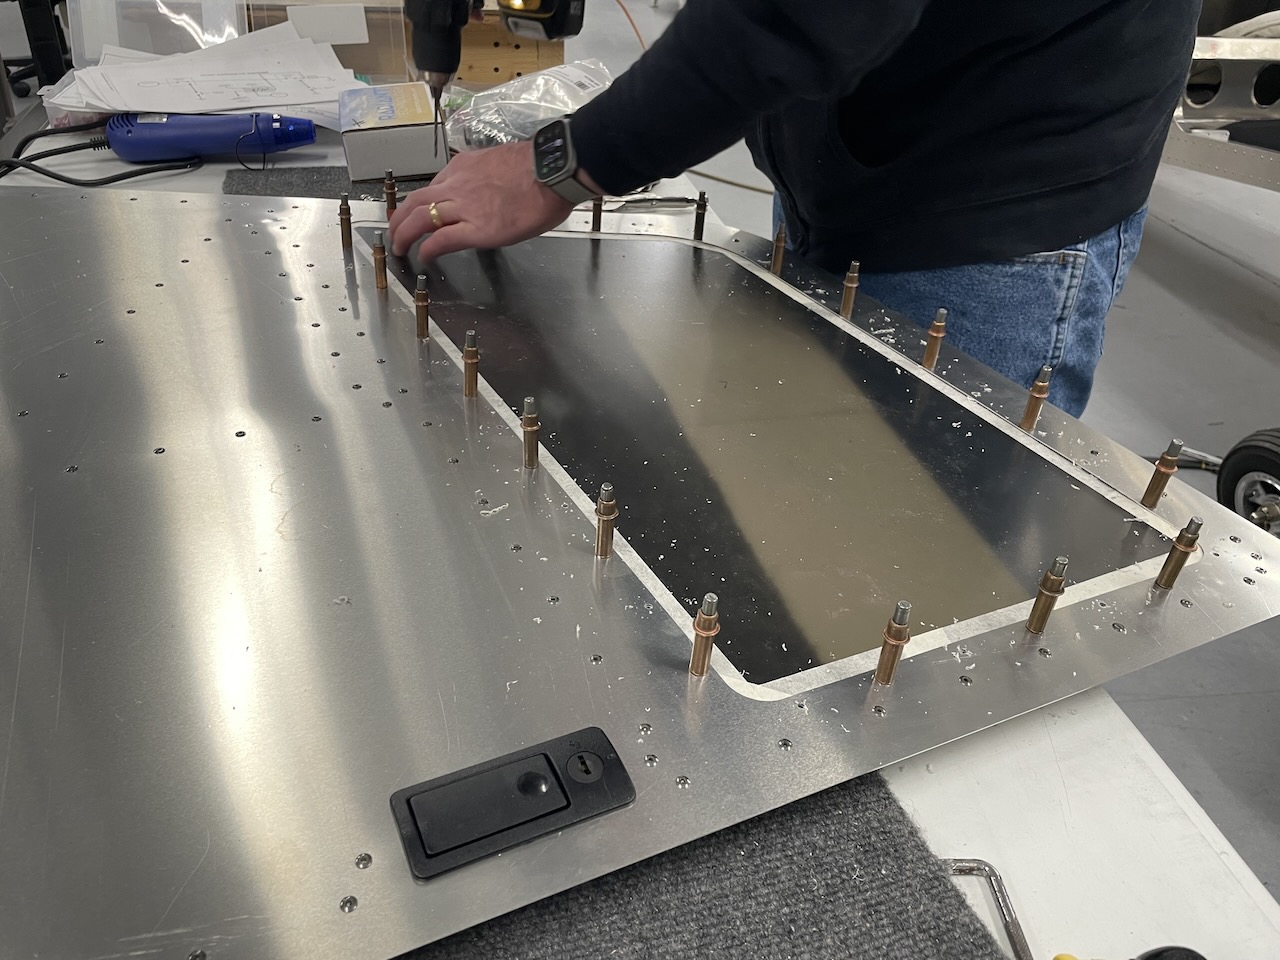 The Highwing kit will feature pre-cut & drilled windows for easy installation. Note that protective film is still on windows pictured here.
 AJ fabricates the hold-down fixture for the windshield mold.
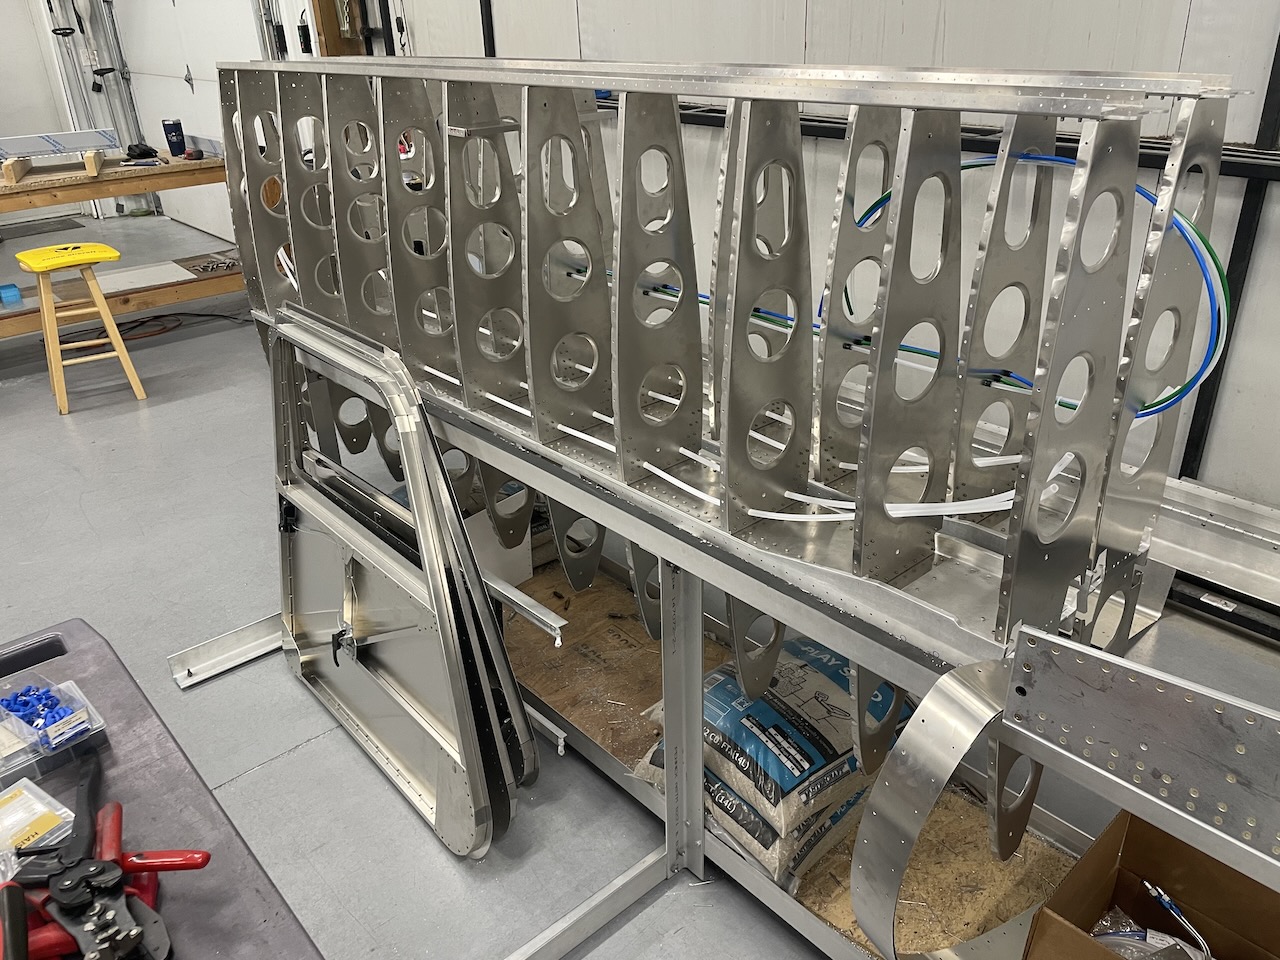
Wing Attach Ties and Wing Installation
The first aircraft set of Sonex Highwing machined wing attach ties have just arrived from the machine shop, allowing completion and installation of the outboard wing panels to move forward. Since our last update, skins have been fitted to the outboard wings using all matched hole tooling, outboard aileron bellcranks have been installed, conduit has been run for wingtip lights wiring and pitot/AOA, and the Dynon pitot/AOA tube installation has been prepared. With the arrival of the wing attach ties at the end of last week, the ties have been test fit, and a wing has been test fit to the airframe at main and rear spar attach points. The outboard wings can now be completed with the installation of the ties and the wing center section can be final-skinned. Read more about the wing attach ties in our June, 2024 project update.
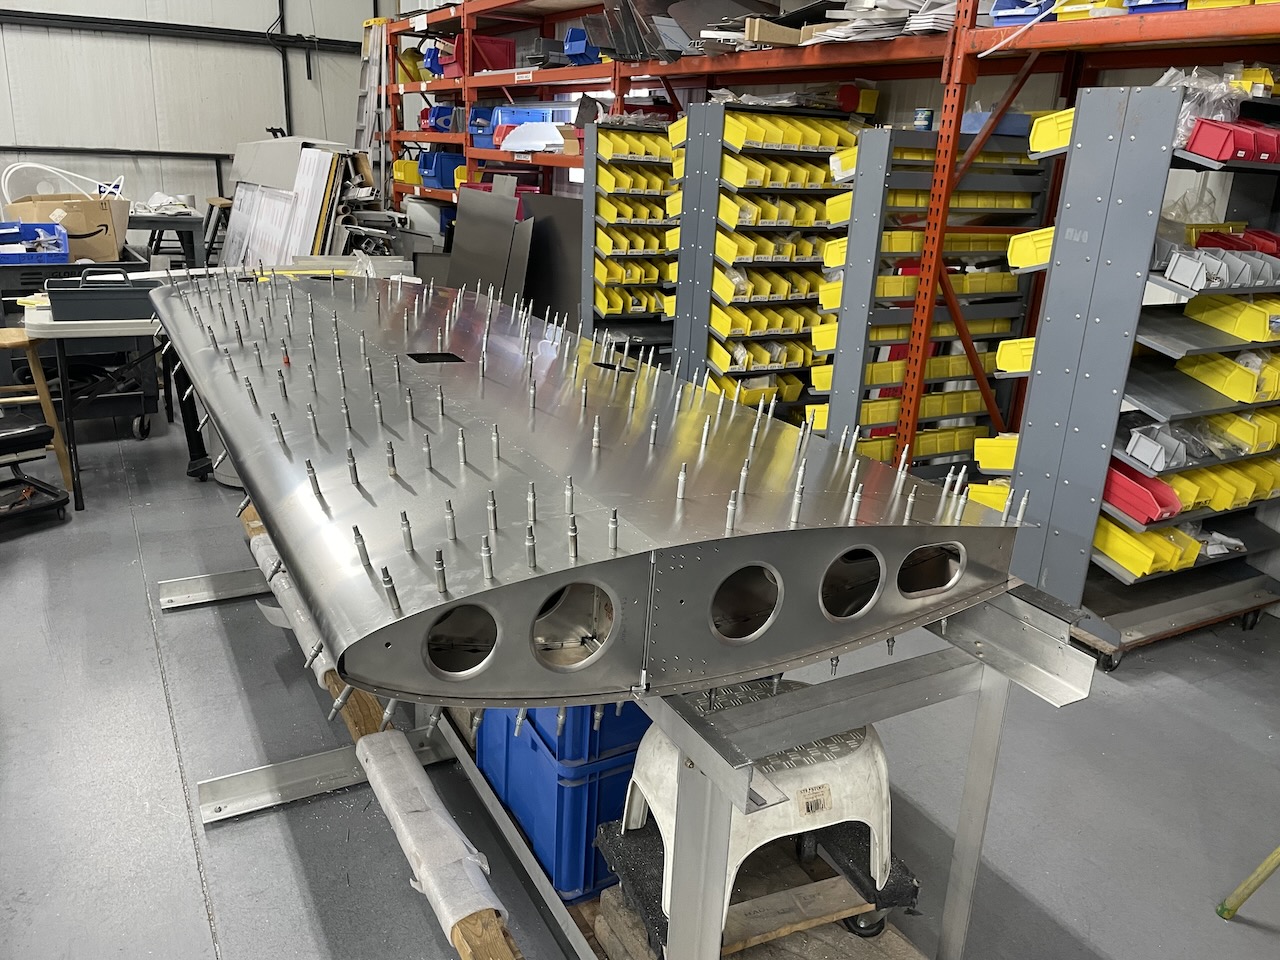 Sonex Highwing outboard wing skinning.
 Fully matched holes, including wing rib flanges made Highwing wing skinning extremely easy.
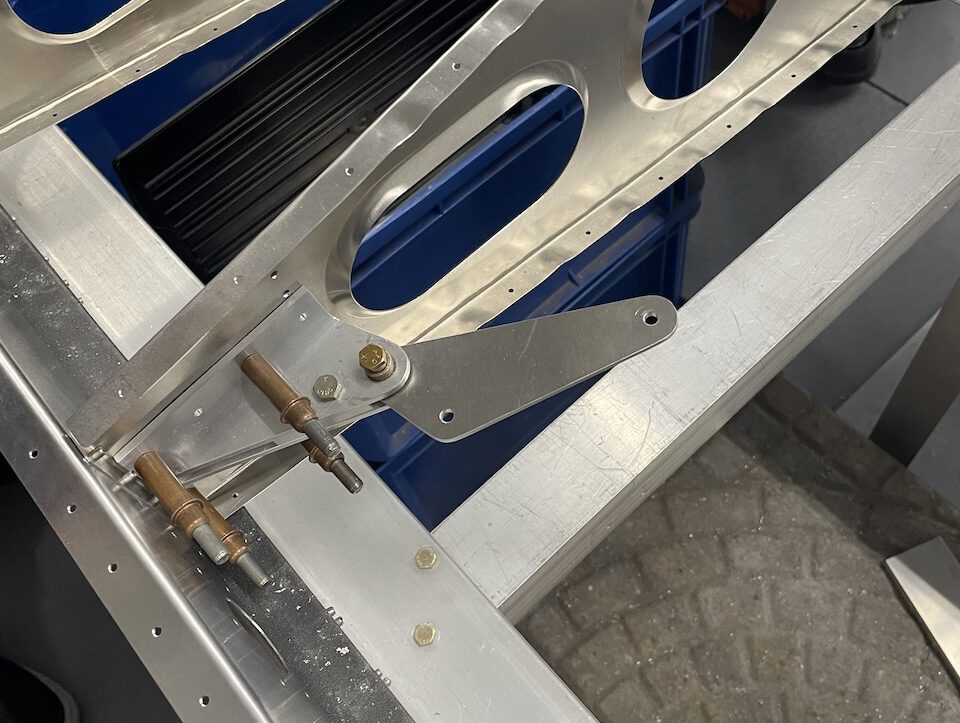 Outboard aileron bellcrank installation.
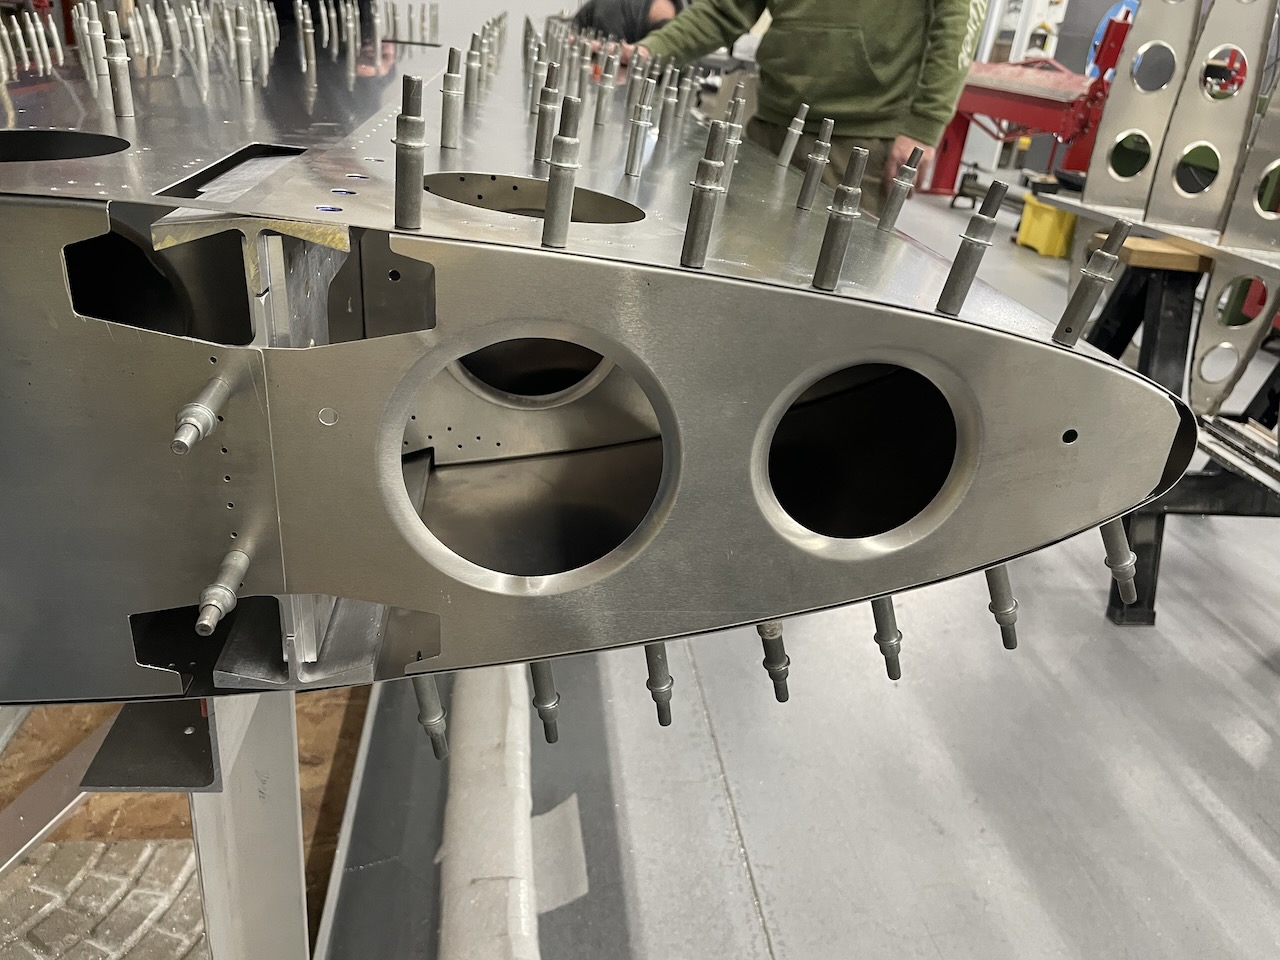
 Outboard wing panels plumbed for wiring and pitot/AOA installation.
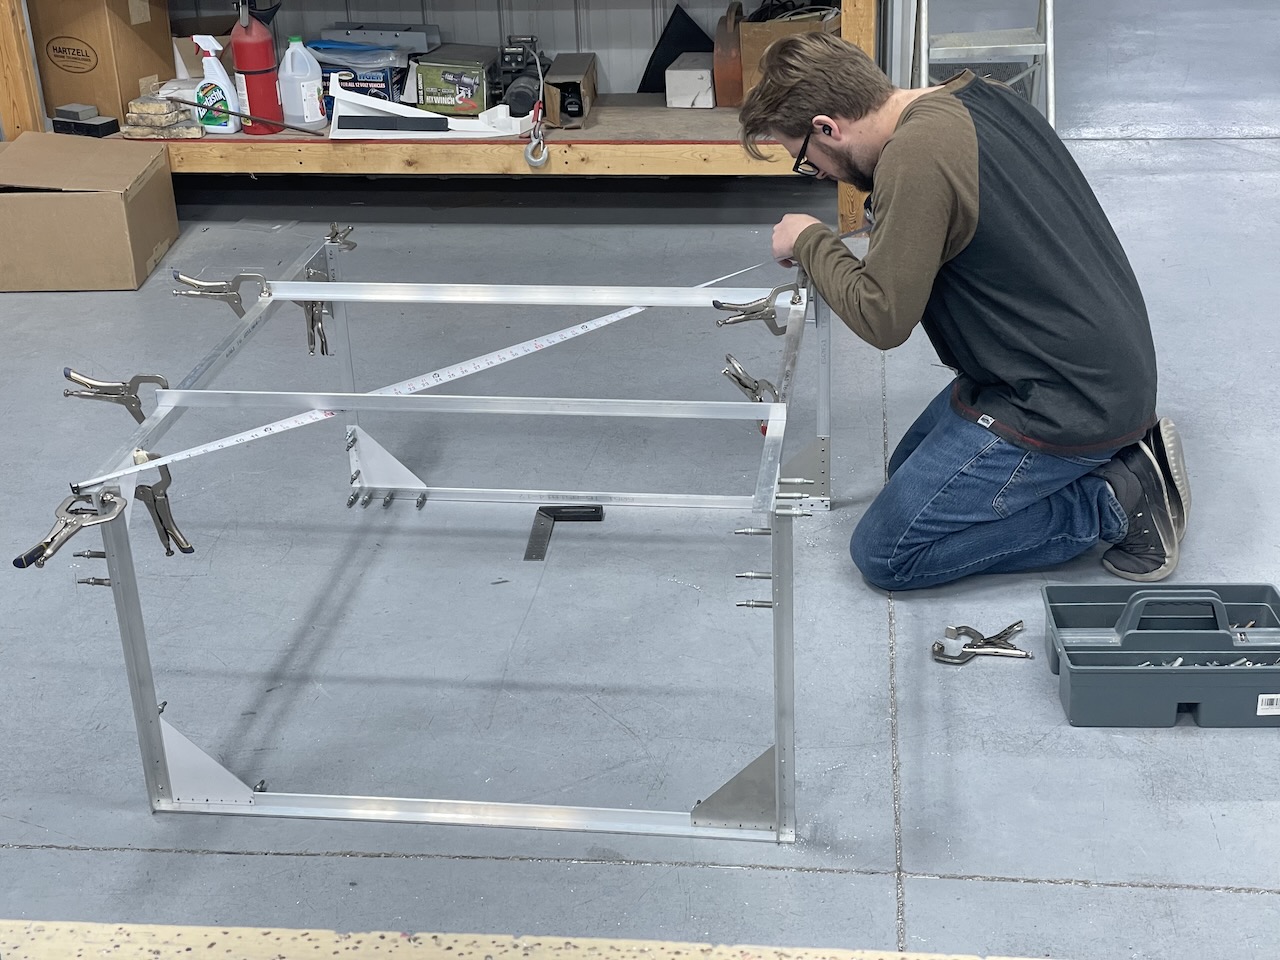
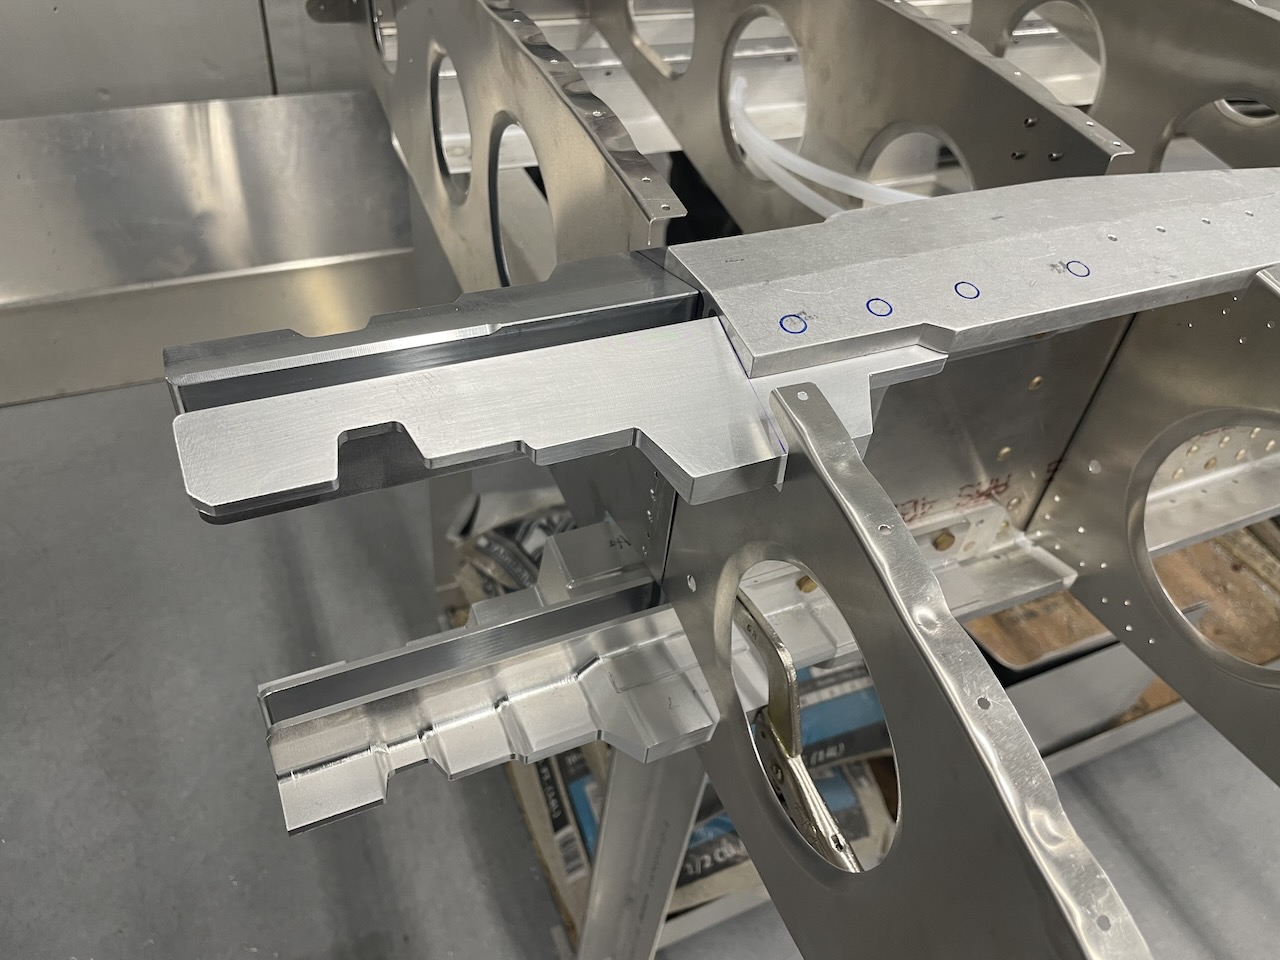 Wing attach ties test-fit to the outboard main wing spar. The various steps are for strain-matching of all wing attach bolts.
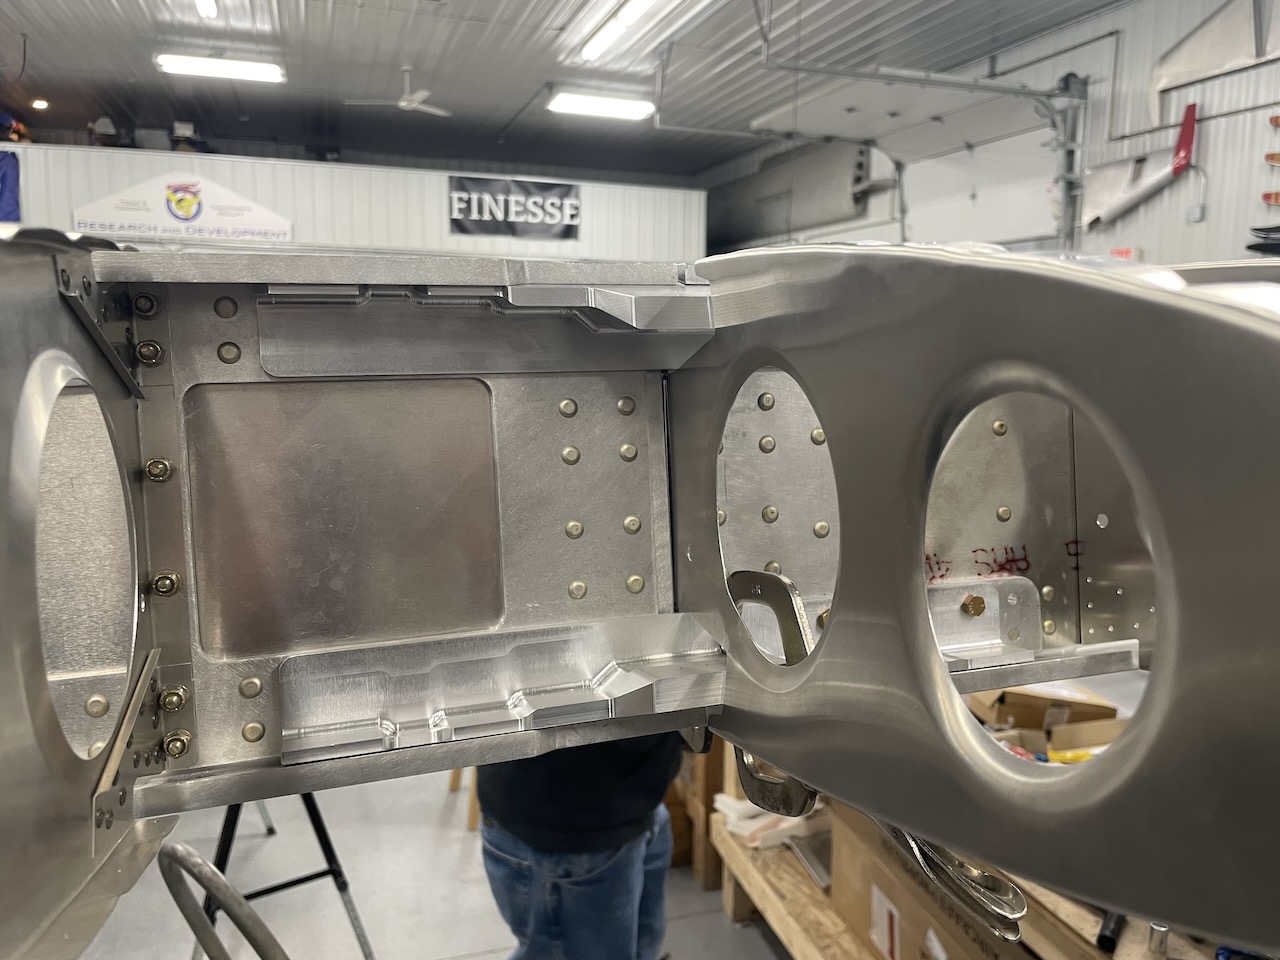 Outboard wing panel (right) test-fit to the inboard wing (left).
 Outboard wing panel (left) test fit to the inboard wing (right) as seen from the rear spar attach (view looking forward).
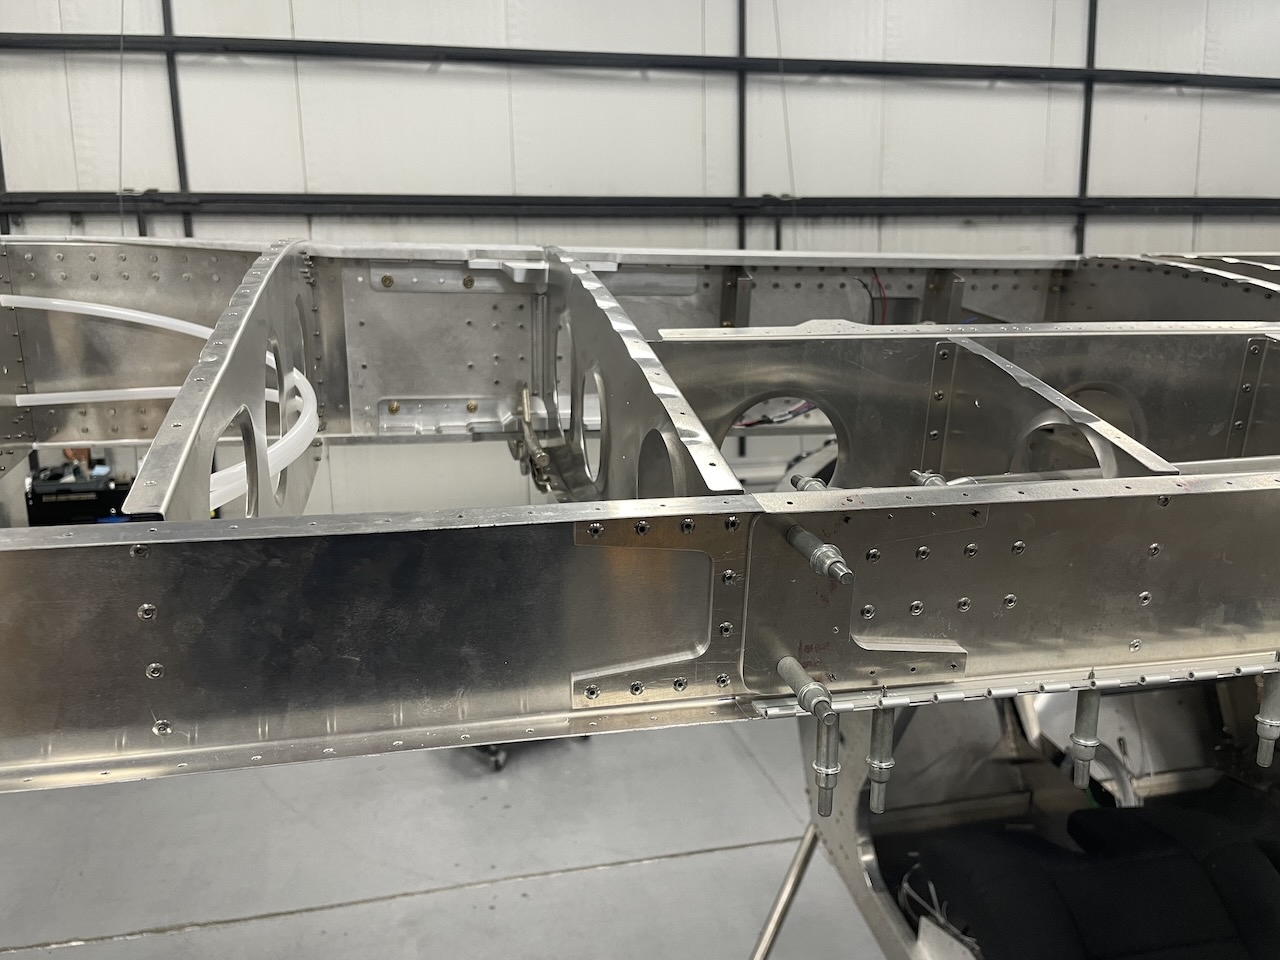
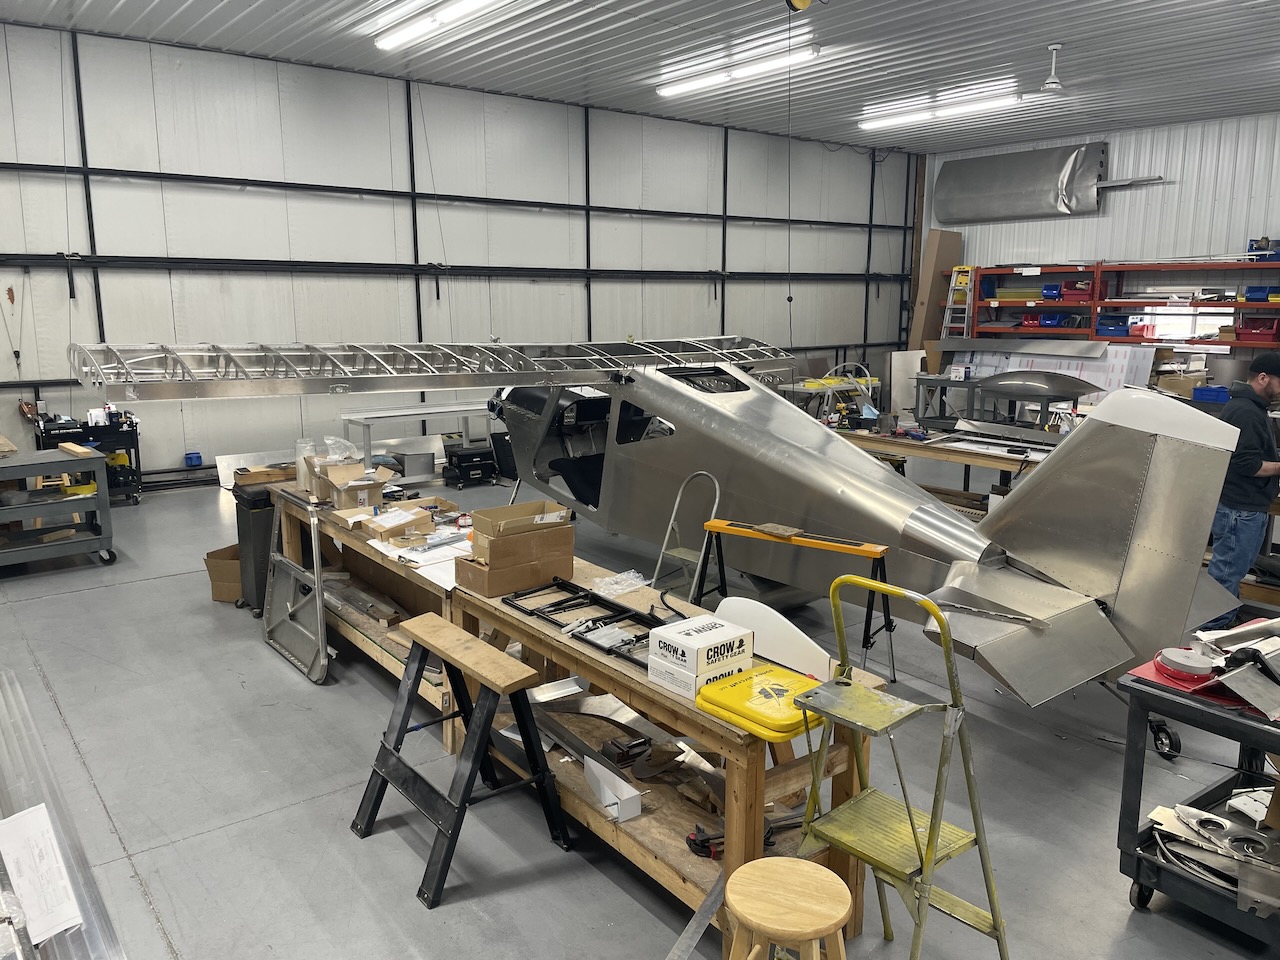 A first look at an outboard wing panel installed with no additional supports.
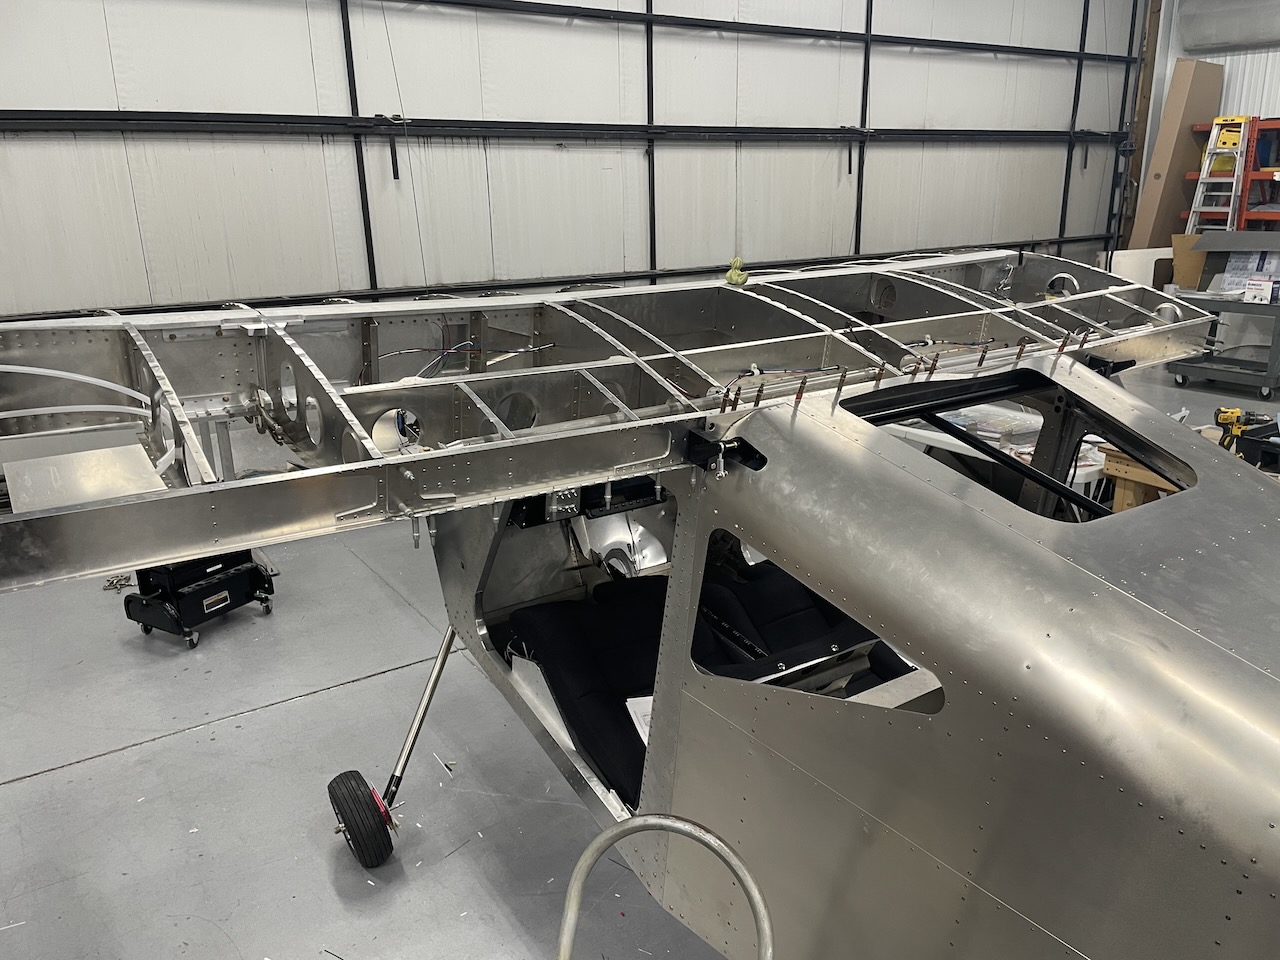 View of the LH outboard wing panel installation also showing the flap torque tube installation and some of the wiring in the ceiling for wingtip lights and the GPS antenna. 3D printed Sonex Highwing ducks are still making appearances around the Sonex facility.
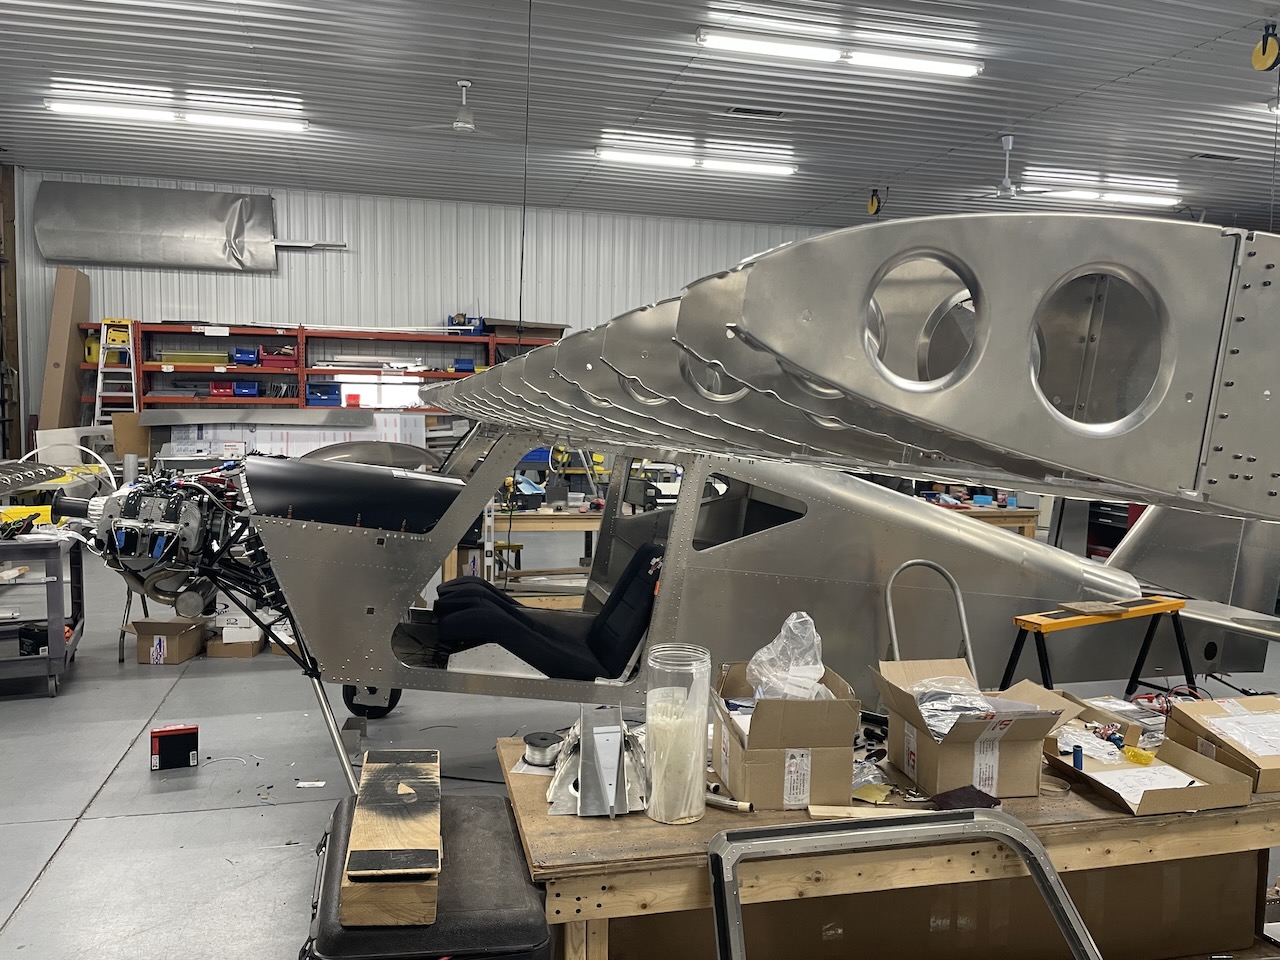 A view from the pilot’s side wing tip.
|
|
Sonex Highwing Estimated SpecificationsSubject to change without notice
* Sonex Highwing features easily interchangeable wing tips for different span configurations. Sonex Highwing is designed to take advantage of the new FAA MOSAIC rules for Light Sport Aircraft! Specifications & Performance Subject to Change Without Notice. |
||||||||||||||||||||||||||||||||||||||||||||||||||||||||||||||||||||||||||||||||||||||||||||||||