Contrary to most stories, I’m going to cheat and tell you the last chapter of this story first. Or, perhaps I should say, I’m going to fill you in on the most recent chapter that I’ve written so far, and then I’m going to sit back and hope that my experiences will help convince you to write a story of your own…
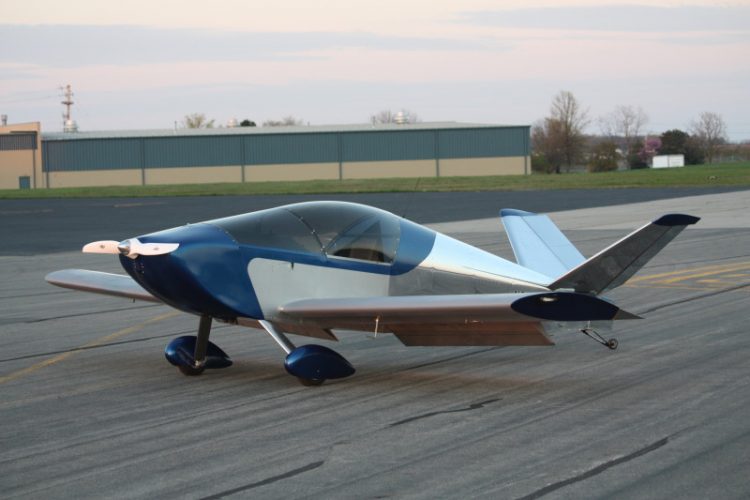
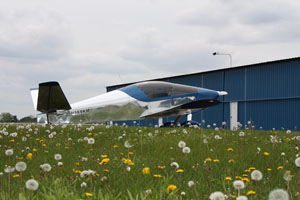
First things first though. I now have a completed, certified, and flying Waiex homebuilt airplane. Registered as N569KM, I flew it for the first time on a beautiful, calm evening in spring 2012. Even though I’m still finishing my Phase 1 test time, it feels pretty darn amazing to be able to write to you that I own a real, flying airplane!
I’ve been asked an awful lot of questions in the past two and a half years as I’ve been building the Waiex, so I thought I would try to write down my own little unique story in hopes that if there are others out there with the same questions, maybe I can help shed a little light on building and now flying what’s turning out to be a pretty darn cool little airplane.
My life with homebuilt aircraft actually started a long time ago. When I was eight years old my father decided he was going to build his own homebuilt airplane, and chose the sleek Wheeler Express as his project. Shortly thereafter the first of five kits arrived at our house, and over the course of the next two decades (yeah, you read that right) he and eventually we completed his project and had a genuine, flying homebuilt airplane. That’s not the story I’m here to tell, but I did use that experience and knowledge later in life as I decided to travel down the same road and start my own project. That first experience gave me some definitive guidelines on what I wanted and didn’t want when I sat down to select a kit to start building.
To be more specific, I had a list of things I was looking for in my own homebuilt airplane:
- Simple, metal construction: After working on the Wheeler Express I had finally become pretty good at composite construction, but the thought of countless hours of sanding to make a good finish AGAIN didn’t really sound all that appetizing to me. Plus I wanted to be able to work on my project year round and not have to worry about temperature sensitive fiberglass layups and resin curing times.
- Easy to fly design: As much as I’d love to get behind the stick of a P-51 Mustang or F4U Corsair, I was hoping to build an airplane that had gentle enough flying and landing characteristics that I wouldn’t break out in a cold sweat on every takeoff and landing. All of us have been outside on those beautiful spring or fall evenings when it’s dead calm, and you’re secretly wishing you were up in an airplane to just to enjoy the view, right? I was hoping for an airplane to enjoy those kinds of evenings.
- Cost effective to build: I’ll put that another way…cheap. I wasn’t concerned about going 300 knots. I really didn’t want to burn over 20 gallons per hour. I wasn’t concerned about having multiple color EFIS displays integrated to at least two different WAAS capable GPS receivers, all coupled to a sophisticated autopilot system. My goal was to build a simple, VFR equipped, fun to fly airplane that I could take up on those beautiful fall evenings, fly for an hour, and only burn a few gallons of fuel in the process.
I’m not going to bore you with the selection process any more than that, but suffice to say that I ended up falling in love with the looks and capabilities of the Sonex line of aircraft, and the Waiex model in general. I still have my copy of the Sport Aviation magazine article that contained a review of Drew Waterworth’s beautiful bright red Waiex (Download the article in PDF format), and there was something about that really cool looking Y tail that just made it stick out in my mind. After some additional research and comparison, I knew I had found the airplane I just had to have so after a few conversations with the wife; I sent out a big check and soon thereafter had a big, heavy pallet and thirteen large, sturdy cardboard boxes in my garage.
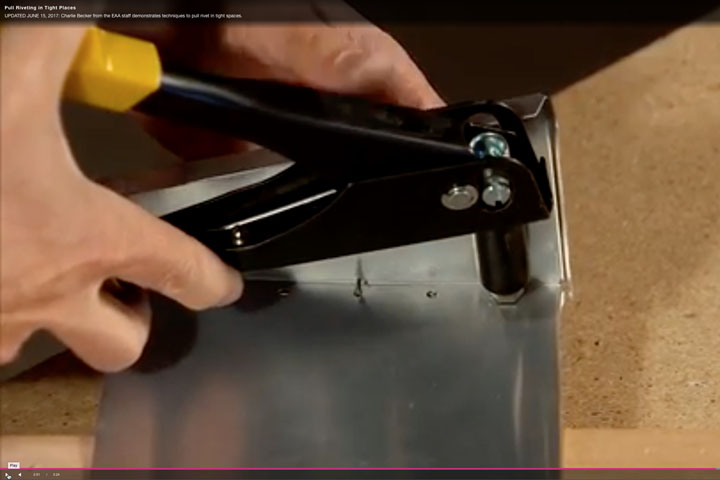
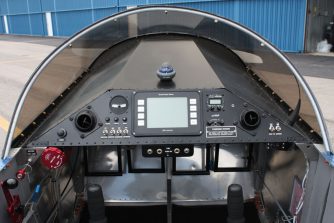
As excited and anxious as I was, I was unprepared for what happened when I actually started the build process. Like so many others, I wanted minimize the risk of messing up an expensive part early on so I chose to start by building the little rudder found on the back of the Waiex. I took the rudder drive horn, bent it a little as called for in the plans, temporarily clamped on a rib, drilled and up-drilled the rib, and after deburring the holes I riveted the assembly together. At that point it hit me; I had a completed assembly and it only took 20 minutes to fabricate! That didn’t seem right; if this were a fiberglass part I would probably still be mixing the resin up for my first lay-up before leaving it alone for a day or two in order to cure. I thought that I must be doing something wrong, but pushed ahead by trimming up the blank skin for the rudder, fabricating up a hinge, drilling on the fiberglass cap, up drilling, deburring, and finally riveting the whole assembly together. I can still remember to this day the shock I felt as I looked at my first completed part, telling myself that I really did just build the whole rudder in a few short hours. Not only that, I had a blast doing it! This project was going to be great!
 |
Now that my build is pretty much over (I hope), I look back and think about how much fun it was to take some pieces of metal, shape them a little, and then rivet them together in order to make many small parts and pieces into one big complete aircraft component. Like most everyone else, I had my moments of confusion or frustration, but after reviewing the plans or asking other builders I was always able to quickly figure things out. Speaking of which, this is perhaps a good time to offer you some of my suggestions that I tell everyone when asked about the build process of my Waiex:
- You’ll clearly see that the plans that come with the kit are some of the best and most detailed in the business. Take the time to study the pages and look over the entire sheet before you start that page’s parts. Looking back, most of my mistakes while building were the result of simply overlooking some detail that’s plain as day on the plans. I created my own motto which was to review twice, measure twice, then cut or drill once. Had I listened to my own advice a little closer I probably wouldn’t be stuck with a nearly perfect flap skin in my hangar with a row of rivet holes 1/8” off from where they should be. Oops…
- Don’t let yourself get overwhelmed. It’s easy to fall into that trap but remember you’re not building the whole airplane at once. You’re building one small part at a time that someday will be combined into a bigger assembly. Sonex does a great job of putting lots of parts on a single plan page and I remember looking at certain pages thinking I’ll never finish all the parts. Just take it one part at a time and the whole process will go quickly.
- If you’re confused, ask someone about it! With hundreds of Sonexes and Waiexes flying, you can always get help and advice from local Sonex (or even RV) builders, but if not, get on the forum boards and search around a little. If you’re still stuck, call Sonex and ask them. Kerry, Jeremy, and John are wonderful guys to talk to, know their stuff, and are always willing to help you with any problems you may run across. All you have to do is ask!
- Probably the biggest piece of advice I can offer…you’re not building a watch, particle accelerator or nuclear reactor! If you’re one of those builders who refuses to settle for anything less than absolute perfection then good for you, but I bet that I’ll be having a lot more fun flying over you in my “less than perfect” airplane while you scrap that same 99.9% perfect piece for the third or fourth time. I’m not saying to accept anything that you don’t feel is safe, but if a part happens to be 0.001” too short, it will most likely be perfectly acceptable! I’m not an engineer but I would estimate that in most cases, if you’re within 1/16” the part going to be completely adequate and have nothing to worry about.
- Finally, last but not least, remember to have fun and enjoy the build! Building one of these airplanes really is a lot of fun!
As I assembled my Waiex, I kept a pretty detailed builders log and tried to be as accurate logging build time as possible. In the end, my airplane ended up taking right around 2.5 years and 1500 hours to go from first rivet to first flight. I know this is more than the advertised building time but not only did I log pretty much every second I was in my garage, I’m also a pretty slow builder. And just for the record, I’m also including some of the more tedious tasks such as polishing, building the engine, and workspace cleaning. If asked how long it takes to build a Sonex or Waiex, I always answer that the factory recommended estimate of 800-1000 hours is a pretty realistic number if you maintain steady progress. Of course, everyone logs their project differently and builds at different speeds, so your mileage will of course vary. Regardless of the number of hours I logged, I still think that the kit goes together very quickly. Remember my father’s Wheeler Express? That “1200” hour build ended up taking close to 4000 hours to finish, so I feel like my 1500 hours went by fast!
And by the way, in case you’re wondering, my Waiex is a standard gear model (i.e., tailwheel) with the dual sticks and I have an AeroConversions AeroVee 2.1 engine up front swinging a Sonex recommended Sensenich wood/composite prop. My plane was built as light as possible and ended up weighing right at 650 pounds empty which I’m pretty happy with. One final note: I’m a pretty big guy at 6’3”, 240 pounds, and with very thin seat cushions I fit in my Waiex very comfortably. Quite often I get asked by taller guys if they can sit in my plane and they always come away very surprised with the amount of room they have. In fact, a 6’4”, 225 pound RANS S-6 builder stopped by my hangar yesterday and after he got in my plane and closed the canopy he still had 3-4” of headroom. I think he was amazed at the generous head and leg room!
If you’ve made it this far and are still reading my story, I’d now like to tell you a little bit about my initial flying impressions of my Waiex. Before I start though, please understand that I’m not an expert test pilot or experienced aviation journalist, so take my conclusions and feelings for what they’re worth. That being said, in my opinion if you’ve ever flown in one of the Vans RV series of airplane, then you pretty much know how a Sonex or Waiex flies. I mean that as an enormous compliment as the RV’s are some of the best flying sport planes I’ve ever flown in, and I have yet to meet a single pilot that doesn’t agree with me. Obviously the Waiex is a little slower and lighter of a plane, but the stick forces and overall feel of the planes are incredibly similar. Both are very enjoyable to fly. For those of you who have yet to fly in a Sonex or Waiex (or Vans RV), let me present my findings and try to compare them to some other planes I’ve flown that you may find a little more common.
First, you’ll find the ground handling of the Sonex line to be unusually easy given the design of the tailwheel. If built per plans (do it…you’ll be happy you did) there’s a direct linkage between the rudder and tailwheel which gives you very precise control. It’s almost “carlike” since there’s no slop in the system verses airplanes like Champs that rely on spring tension for tailwheel control. The only potential downside is you can’t lock up one main wheel and pivot in a tight place in a Sonex, but in my personal opinion that’s an easy sacrifice to make. In terms of ground visibility, depending on your height and the number of cushions you’re sitting on, you will probably just be able to see over the nose during taxi. If not a slight lean to the left will bring the taxiway centerline into view, but you’ll probably do some slight S-turns going down the taxiway anyway. For a tailwheel airplane visibility overall is really pretty good.
 |
Once you’re ready for takeoff, you’ll find the first surprise of the flight…the Waiex is a very easy airplane to control on takeoff. With that direct linkage tailwheel, you won’t be kicking the rudder pedals nearly as much as you probably did in other taildraggers. In fact, I would suggest you use gentle control pressures for steering until the time comes to raise the tail. By the way, if you’re thinking Waiex, it may be in your best interest to keep the tailwheel on the pavement until you’re around 40 miles per hour in order to ensure positive directional control. That tiny little rudder is surprisingly effective in cruise, but early in the takeoff roll with no real airflow, it can only do so much. [note from Sonex: the complete “Y” tail assembly contributes to rudder control, as the mixed ruddervator surfaces deflect with rudder pedal inputs, not just the 12″ stub rudder.] Do yourself a favor and keep the tailwheel on the ground until you see 40-45 mph, gently release back pressure, and then smile as the airplane smoothly departs the runway. One final item to remember; if you decide to go with a VW engine such as the AeroVee, you’ll be using left rudder on the takeoff since the propeller is turning the opposite direction verses a Lycoming. You’ll hardly notice it, but it is something to think about.
I haven’t determined the exact best rate of climb speed in my airplane yet, but I can tell you it climbs around 500-700 feet per minute if I keep the speed around 90 mph. I’m pretty sure I can get better climb out of it by climbing closer to 80 mph but I’m still breaking in my AeroVee and don’t want it to get too hot. By the time you’re airborne the rudder has plenty of authority so keeping the ball in the center during climb and then cruise takes no real effort. You’ll also be pleasantly surprised to find the controls more sensitive than that old Cessna 152 or Champ you’ve been flying. Note that I did not say “touchy”, just more sensitive. Ailerons feel very well balanced and get just slightly heavier once the speed builds up. The elevator is also much lighter than what you’re used to so be gentle with your control inputs on the first flight or two until you’re a little more comfortable with the plane. For me, using gentle pressures of around 5 pounds stick force and around 2-3” of stick displacement is all I’ll ever need during cruise flight. If for some reason this worries you, don’t worry; the Waiex isn’t only easy to fly, if you decide to play fighter pilot and throw it around the sky in a series of rolls, loops, and steep turns, it’s also a complete blast!
Once you level off, visibility over the nose is about on par with a Champ or Cessna 152, which is to say pretty decent. In all other directions, the view is outstanding! That big bubble canopy gives an unrestricted view in every direction except straight back and down, and you’ll find that the canopy bow doesn’t really create any noticeable blind spots. The wings are fairly short and don’t block much of the view, and normal clearing turns are all that’s needed to see below you. Again, I’ll compare the view to the RV series and say that a stock Waiex has a better view than an RV slider and not quite as good as an RV tip-up. If you’ve been flying a Cessna, you’re going to feel like you’re sitting on a magic carpet outside the airplane!
Ever since its first flight, my Waiex has flown hands off with the ball very nearly in the center. I have all wheel and gear leg fairings in place, and thus far my indicated speed at 2950-3000 rpm hovers in the 125-128 mph range at 3000’ MSL. I’ve been told that once my engine is completely broken in, I will probably get a little more speed so the factory claim of 130 mph at low altitudes seems pretty accurate. One thing you’ll discover is that these are pretty clean airframes, so if you let the nose drop a little speed will build up in a hurry unless the power is reduced. On several occasions I’ve dropped the nose around five degrees and seen speeds build up 10-20 mph in only a few seconds, so be cautious and maybe think about slowing down a little if you’re going through heavy turbulence or beginning you descent.
Once it’s time to get back in the pattern, reducing the power around halfway (maybe 2000 rpm) will allow you to descend without building too much airspeed. Thus far I’ve found that aiming for around 100 mph on downwind works really well, but you should be prepared to make a big power reduction on the downwind leg if you want to land. I’ve found myself high and fast on a few approaches as a result of not bringing back the power enough when I get abeam the numbers. One method that seems to work well for me is to pull power back to around 1500-1600 rpm abeam the desired landing point on downwind, pull down the first 10 degrees of flaps, and then let the nose down to hold around 90 miles per hour. This will help stabilize your airspeed as well as begin a comfortable descent. Base leg at around 90 mph works pretty well and once you’re on final pulling on the rest of the flaps and aiming for around 75-80 mph seems to work very well. Visibility over the nose is still excellent, all the way to the flare. Speaking of the flare, do yourself a favor and plan on three point landings only, especially in the Waiex. You can wheel land the airplane but if you bring the plane over the numbers at 70-80 mph, slowly close the throttle, and then ease the nose up to your three point attitude, you’ll be rewarded when it rolls on effortlessly. Those beautiful titanium gear legs will absorb a lot of bumps and holding the stick back gives that direct linkage tailwheel positive control throughout the landing roll. Like most other Sonex owners, I generally don’t touch the brake handle until I’m clear of the runway but they have plenty of authority if I need them.
 |
Overall, I think you will find the Sonex or Waiex airplanes some of the easiest tailwheel airplanes available to fly. They are still tailwheel airplanes and you need to pay attention a little more than that old Cessna 152, but if you’re comfortable in a Champ or Citabria I don’t see you having any issues flying and being comfortable in very little time. If you’re looking for an easy to build, fun to fly, and inexpensive fun machine you should give serious consideration to the Sonex, Waiex, Xenos, or Onex line of airplanes. I haven’t regretted my decision once, and can’t wait to continue enjoying my awesome little airplane! Now if I can just talk John and Jeremy Monnett into selling me a SubSonex kit…
Thank you for your time and reading my story. I hope you’ve found it informative and helpful if you’re considering ordering one of the Sonex designs. Please email me if you have any more questions or comments; I love meeting and talking to new Sonex builders and pilots.
In the meantime, have fun building, fly safe, and I hope to see you up at Oshkosh!
Yours truly,
Mike Farley
Owner and Builder, Waiex #0056
michaelfarley56@gmail.com

